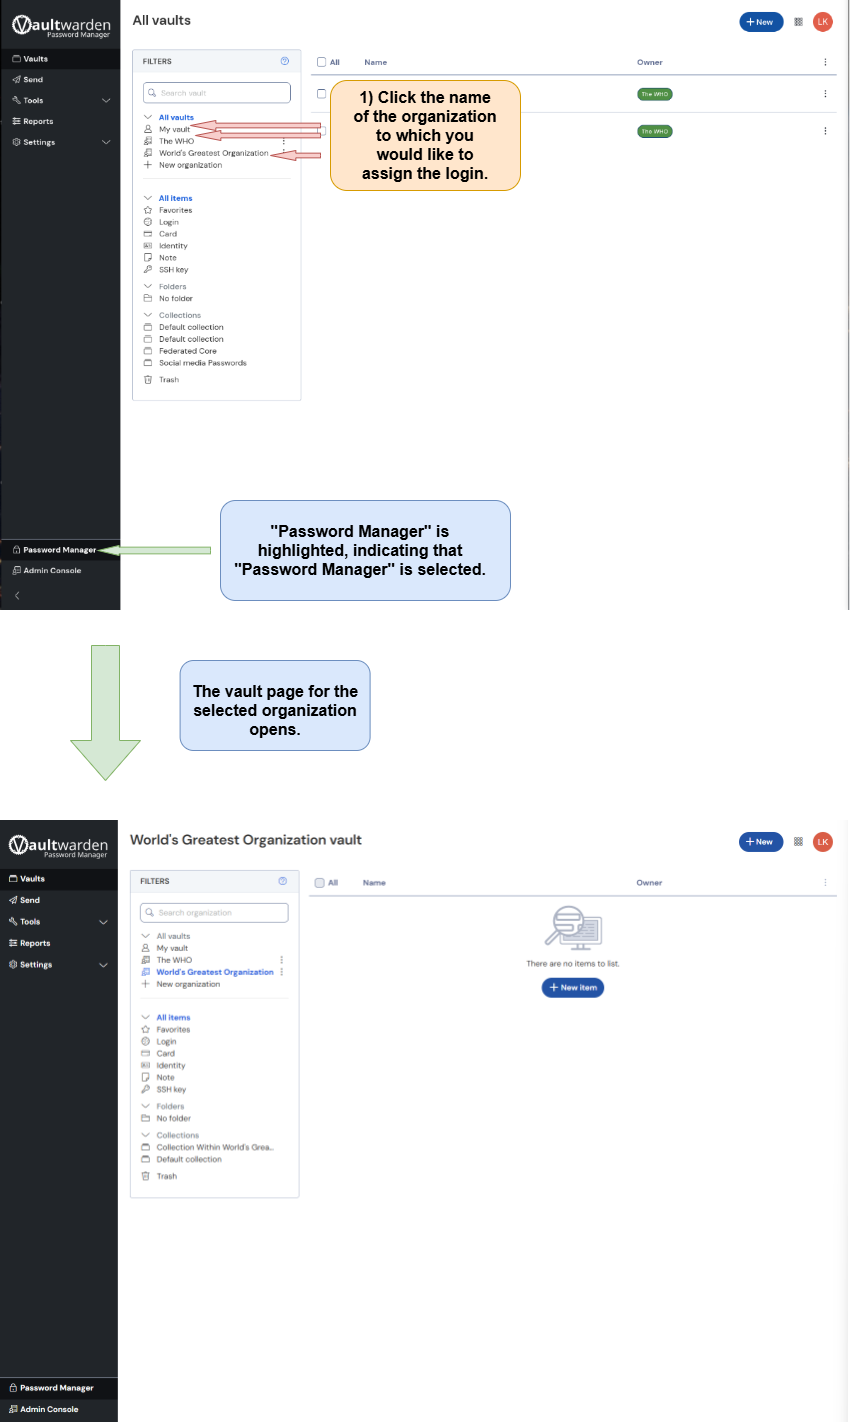
2) Select the organization in which to place the login.
Note: The steps below are used to assign a login to an organization that already exists.
If you would instead like to assign a login to a new organization, first follow the directions in the “Create An Organization In Vaultwarden” document linked here.
Then, after you create the new organization, return to this document and follow the steps below to select the organization where the login will be placed.
-------------
There are two methods that can be used to select the desired organization:
The user can select an organization via the Password Manager (steps 2a and 3a)
OR
The user can select an organization via the Admin Console (steps 2b and 3b).
2a) Use The Password Manager Screen To Select An Organization
Use The Password Manager Screen To Select An Organization. Follow the directions below.
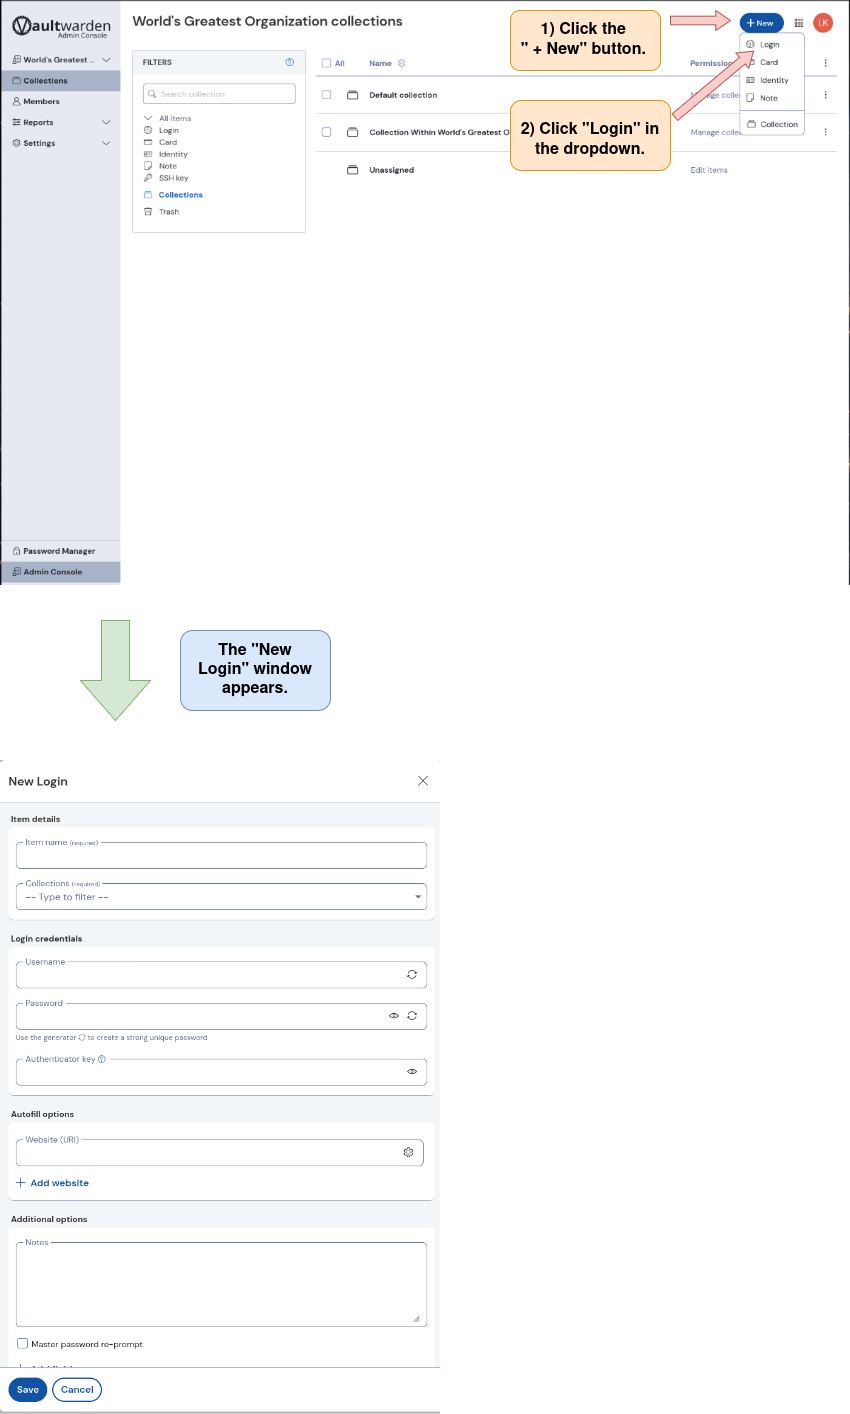
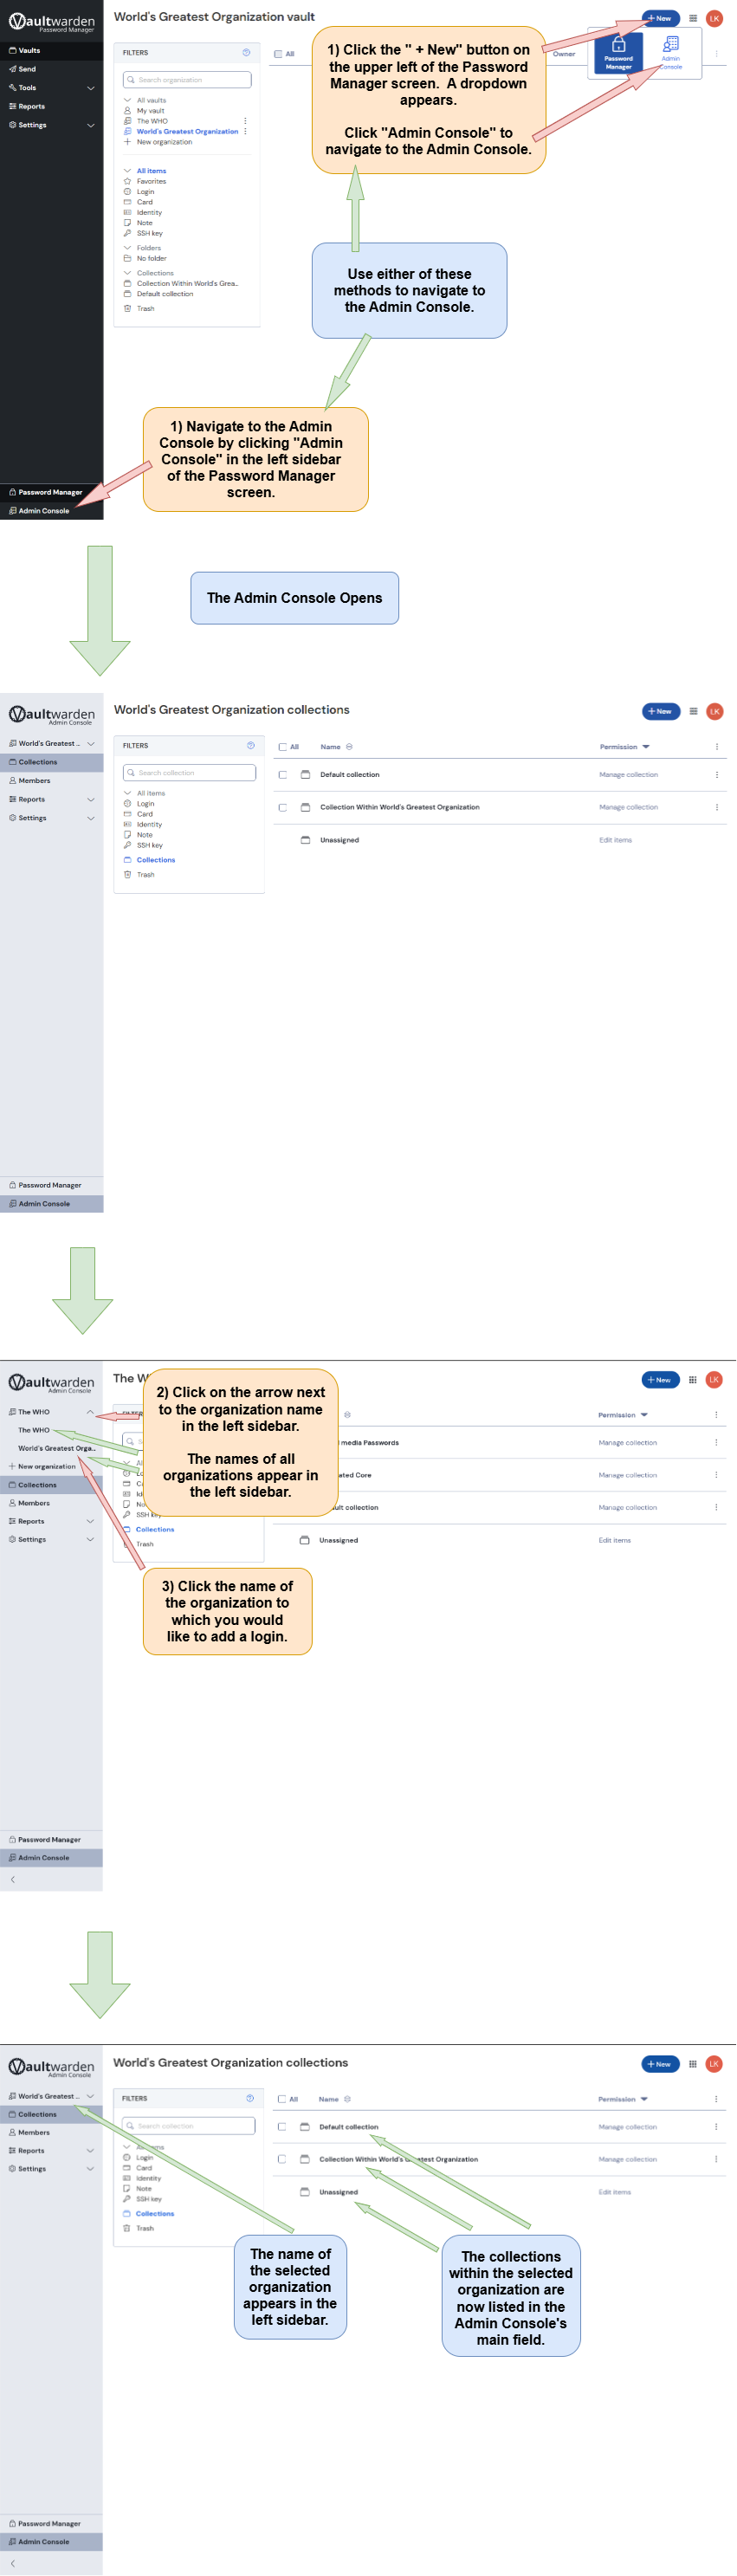
2b) Use The Admin Console To Select An Organization
If you completed step 2a, skip step 2b and go directly to step 3a.
Use the Admin Console to select the desired organization. Note that there are two methods for navigating to the Admin Console. Follow the directions below.
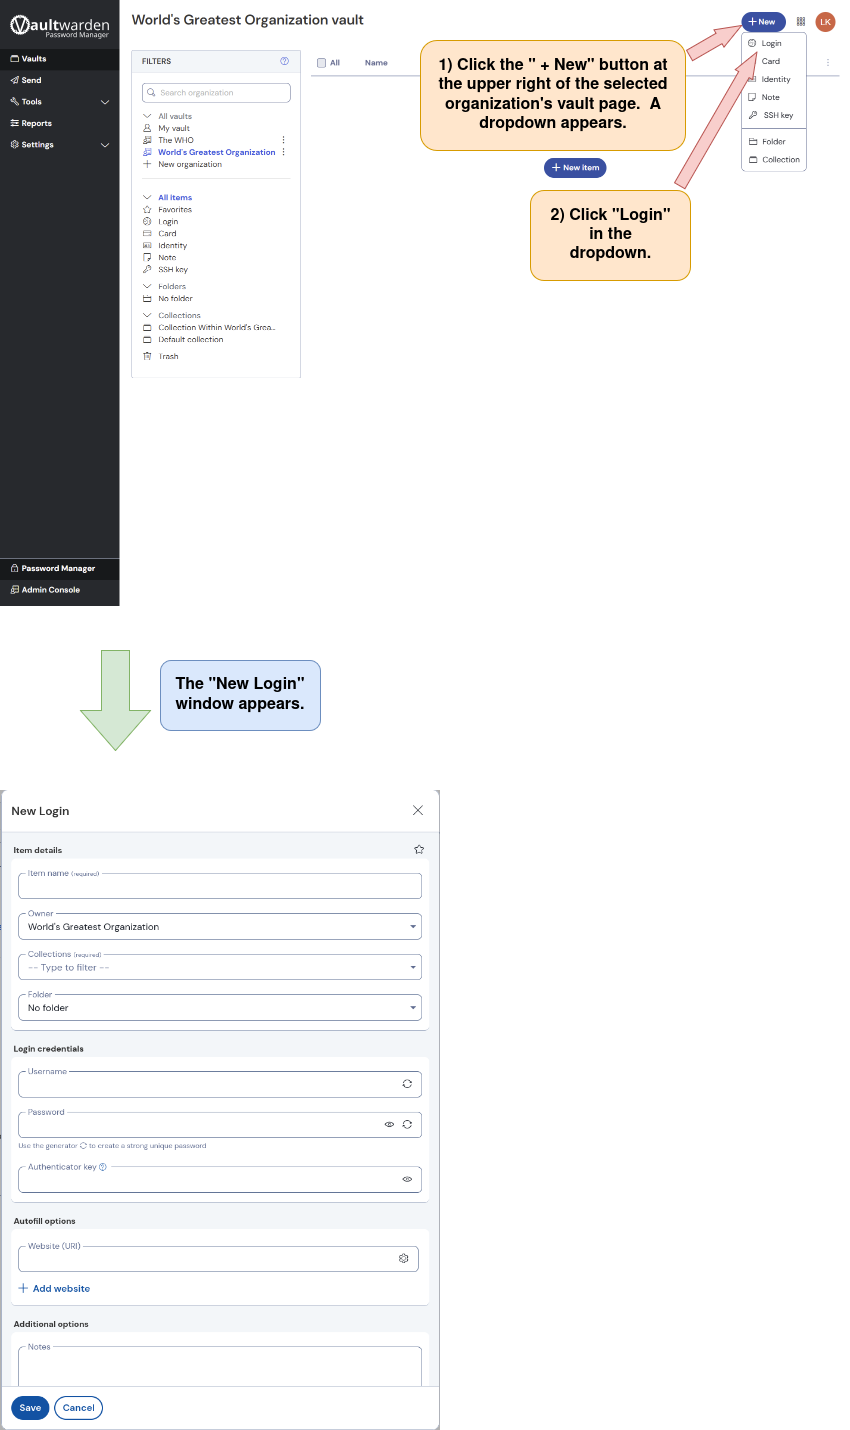
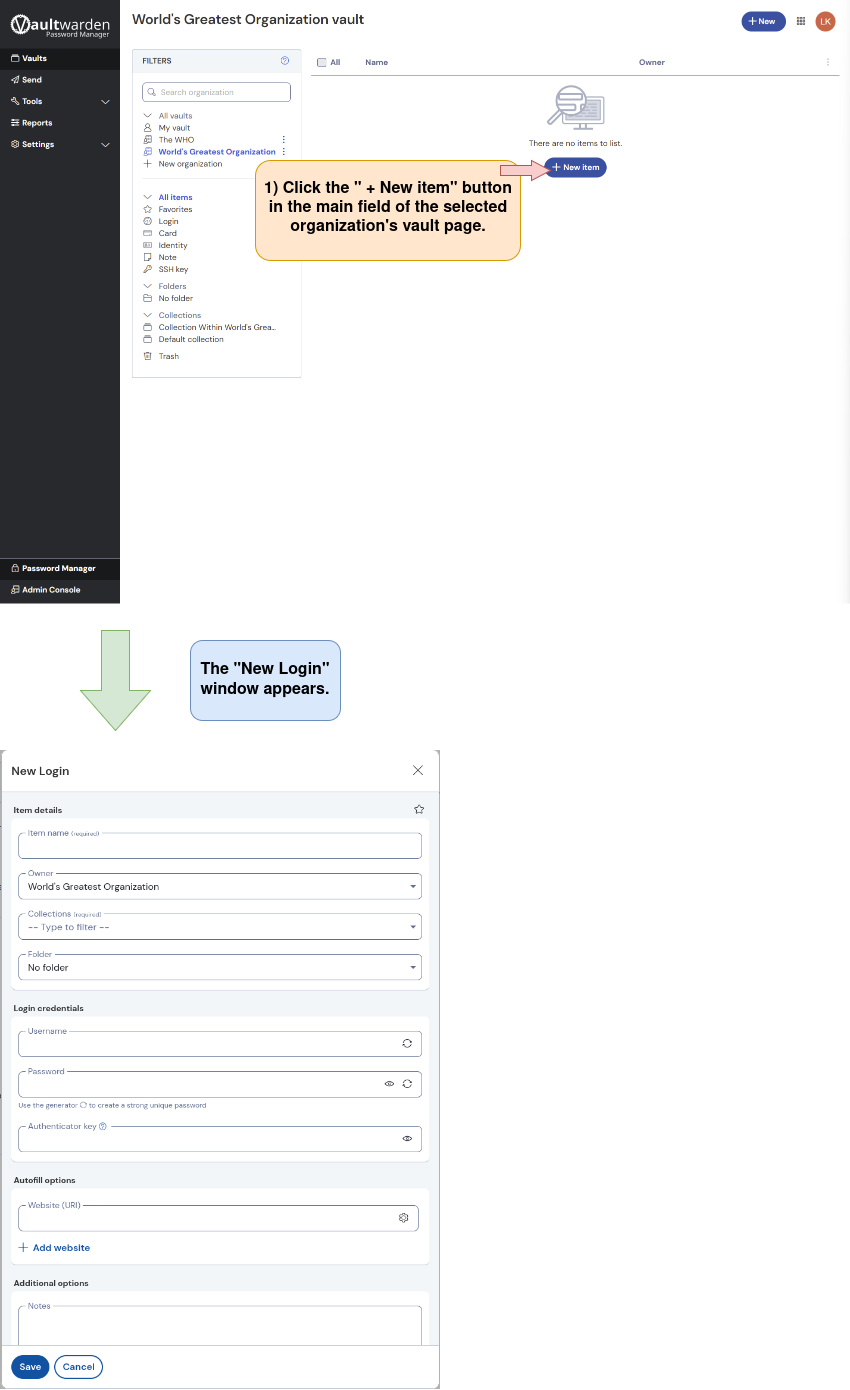
3a) Open the “New Login” window from the Password Manager screen.
If you completed step 2b, skip step 3a and go to step 3b.
There are two options for opening the “New collection” window from the selected organization’s vault page.
Option 1: Click the " + New Item" button in the main field of the selected organization’s vault page.
Option 2: Click the " + New" button in the upper right corner of the selected organization’s vault page. Then click “Collection” in the dropdown.