If you would instead like to assign a login to a new organization, first follow the directions in the “Create An Organization In Vaultwarden” document linked here.
Then, after you create the new organization, return to this document and follow the steps below to assign a login to the organization.
-------------
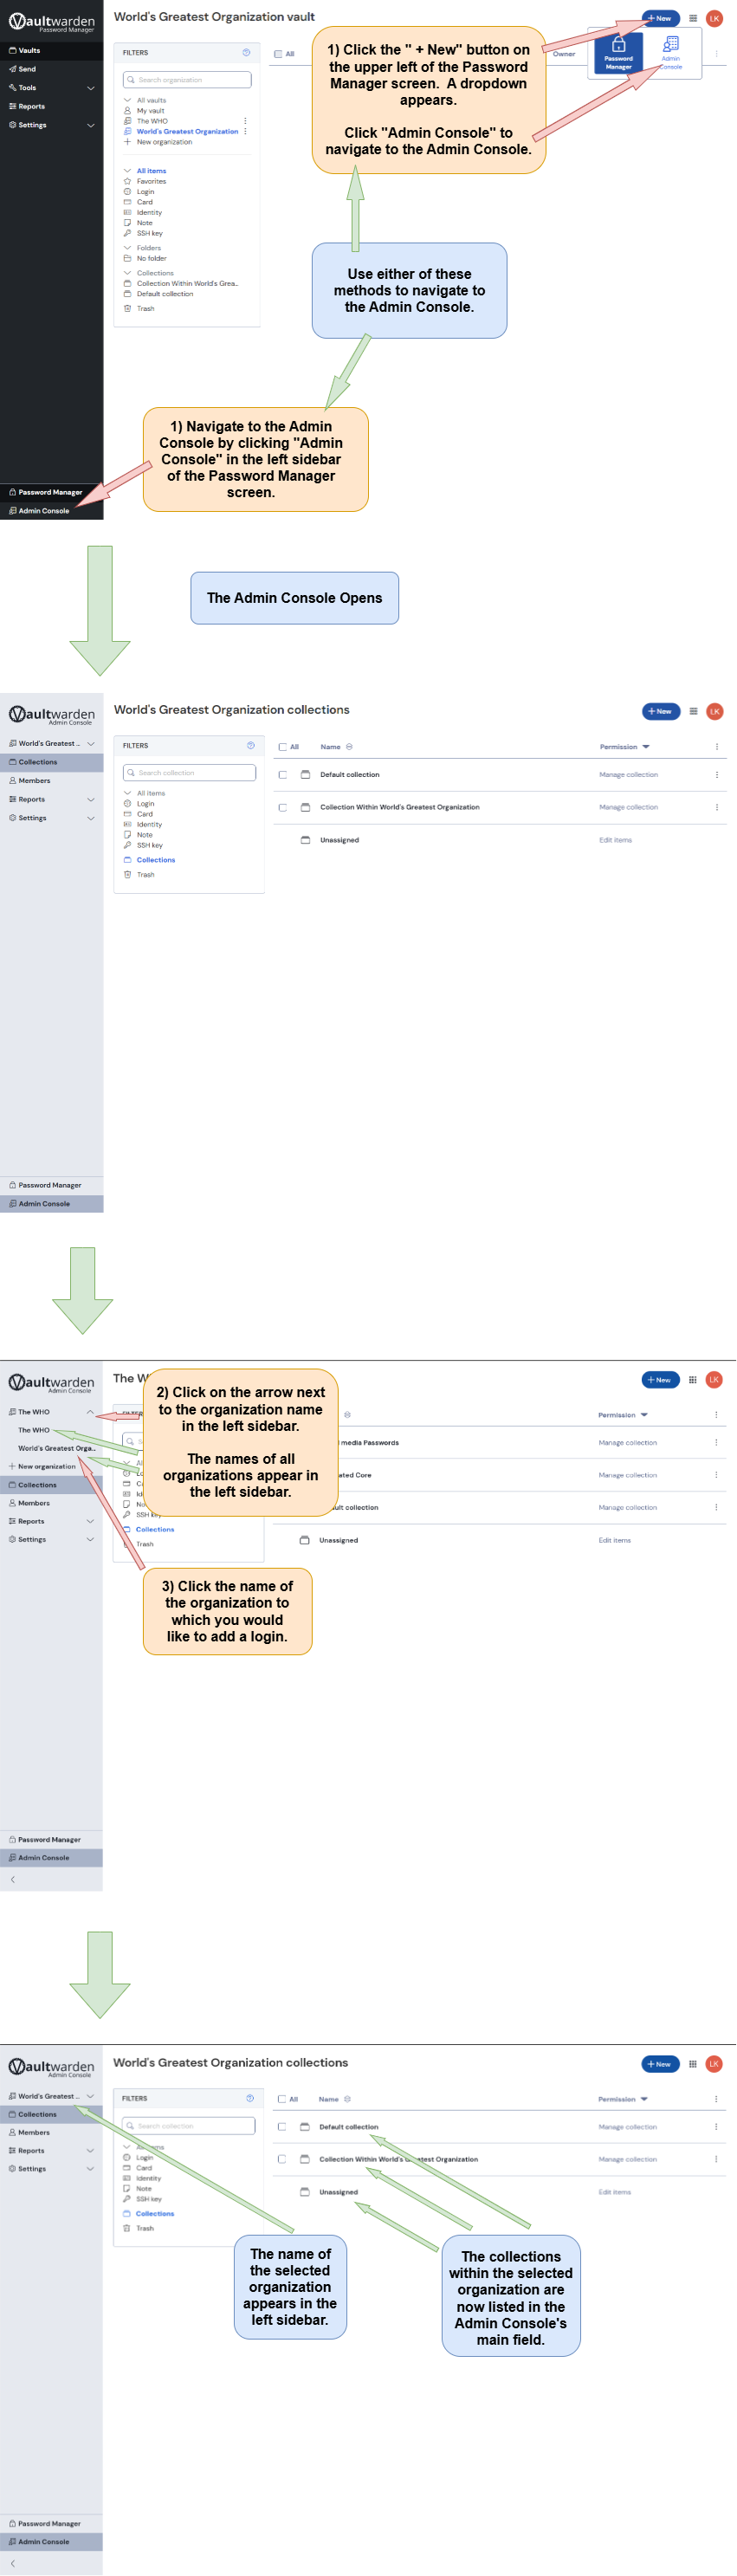
Assign the new login to an existing organization.
There are two methods that can be used to select the desired organization:
The user can select an organization via the Password Manager (steps 2a and 3a)
OR
The user can select an organization via the Admin Console (steps 2b and 3b).
2a) Use The Password Manager Screen To Select An Organization
Use The Password Manager Screen To Select An Organization. Follow the directions below.
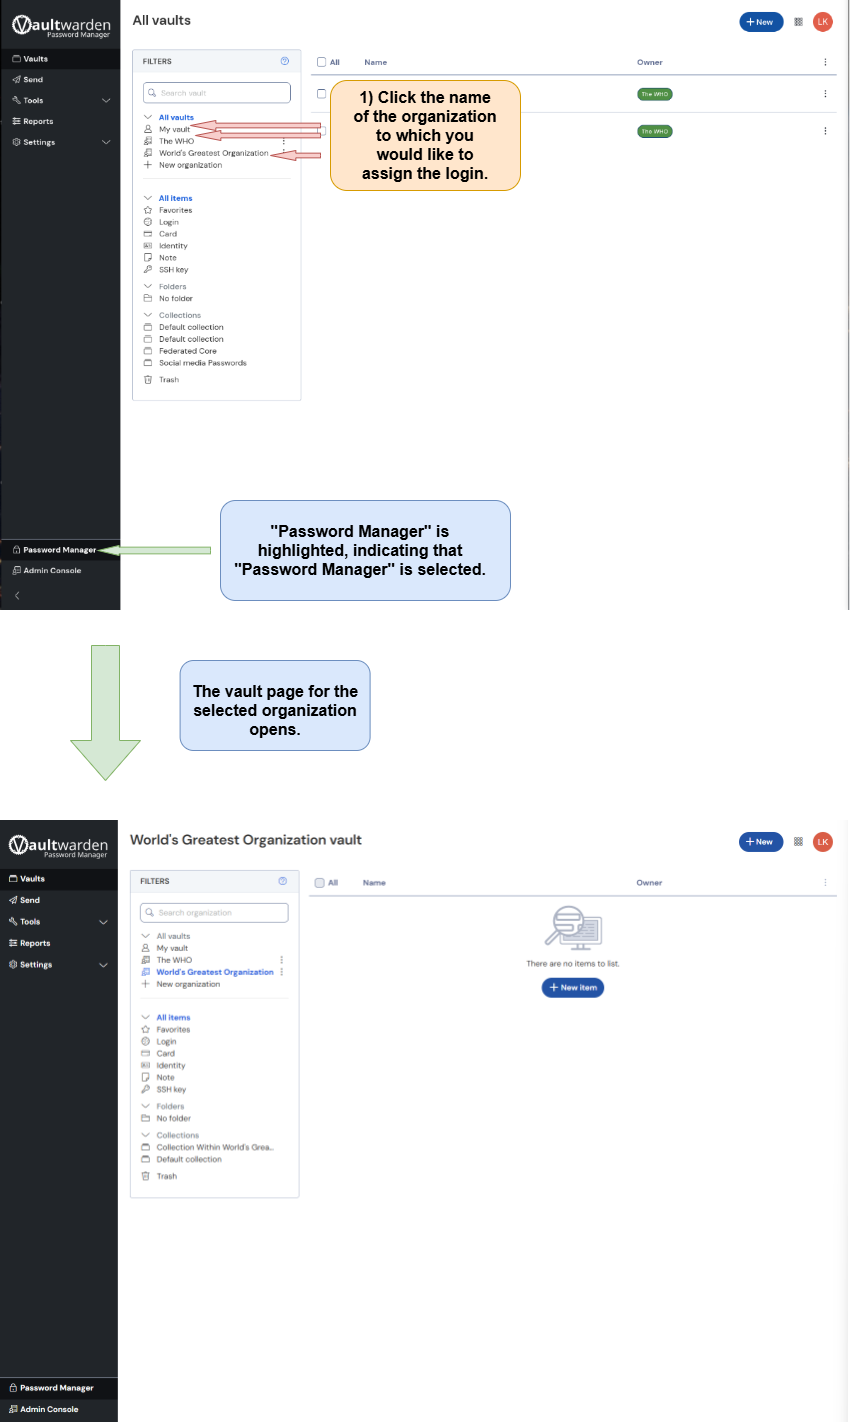
2b) Use The Admin Console To Select An Organization
Use the Admin Console to select the desired organization. Note that there are two methods for navigating to the Admin Console. Follow the directions below.
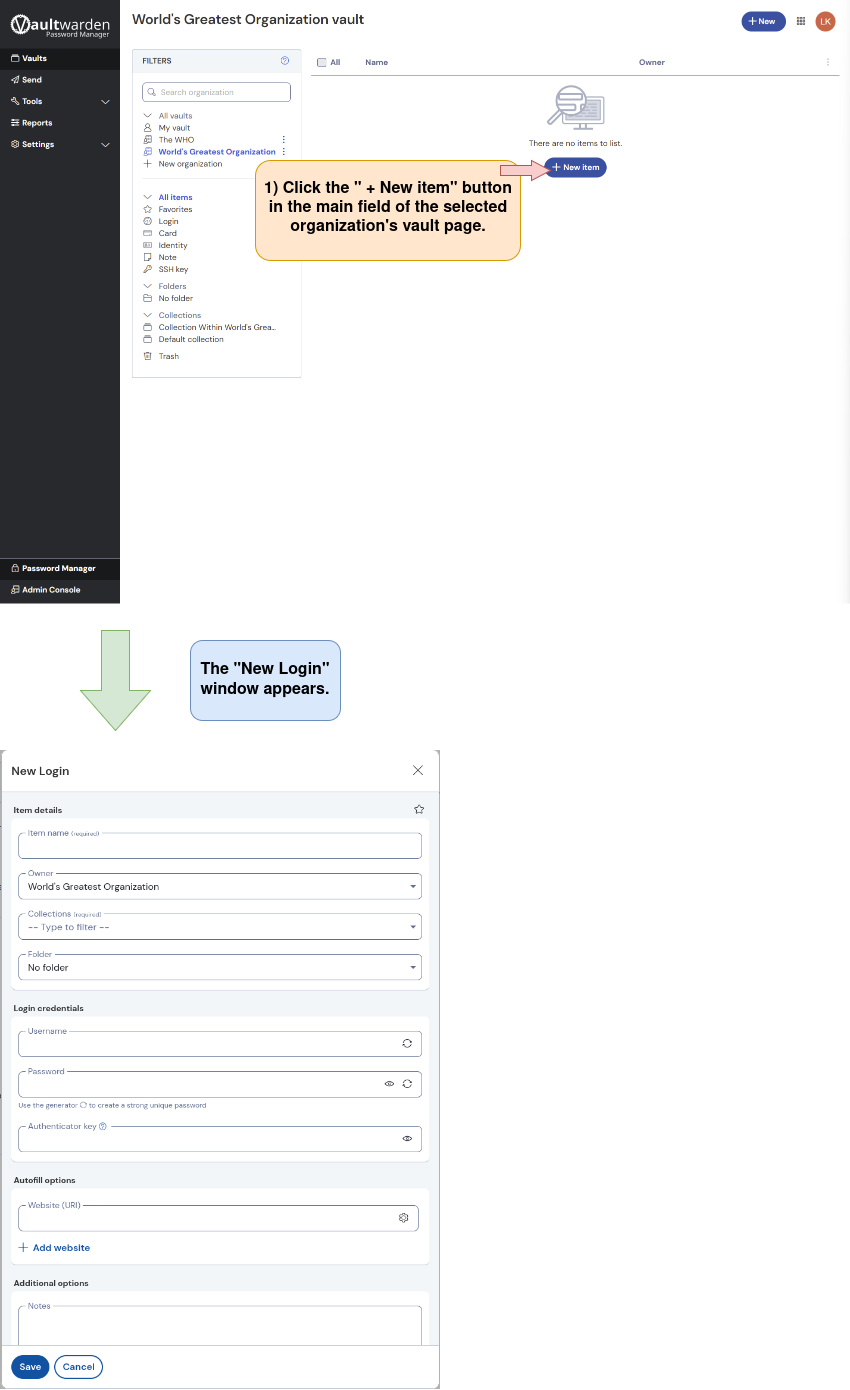
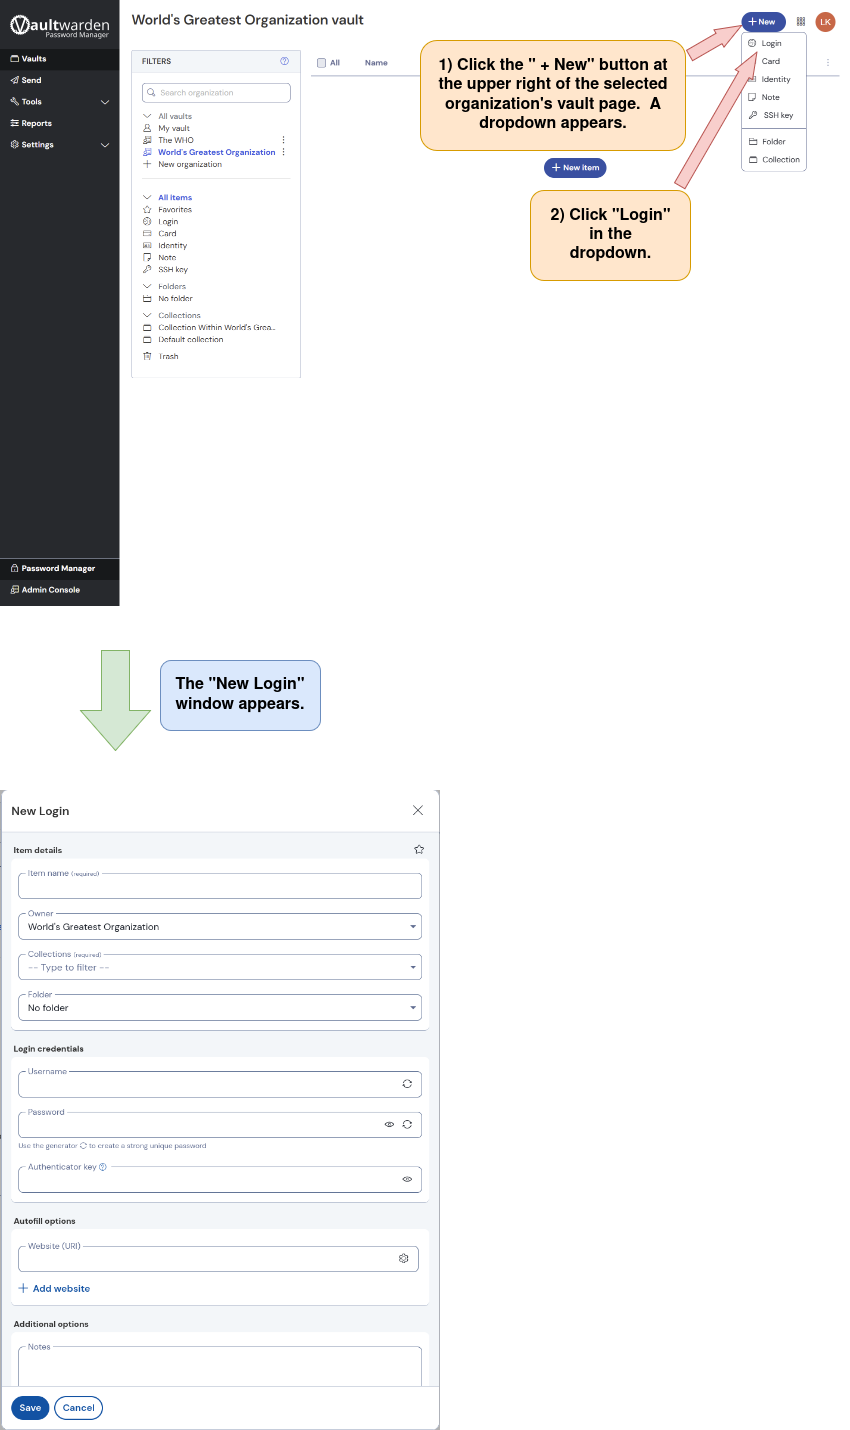
3a) Open the “New Login” window from the Password Manager screen.
There are two options for opening the “New collection” window from the selected organization’s vault page.
Option 1: Click the " + New Item" button in the main field of the selected organization’s vault page.
Option 2: Click the " + New" button in the upper right corner of the selected organization’s vault page. Then click “Collection” in the dropdown.
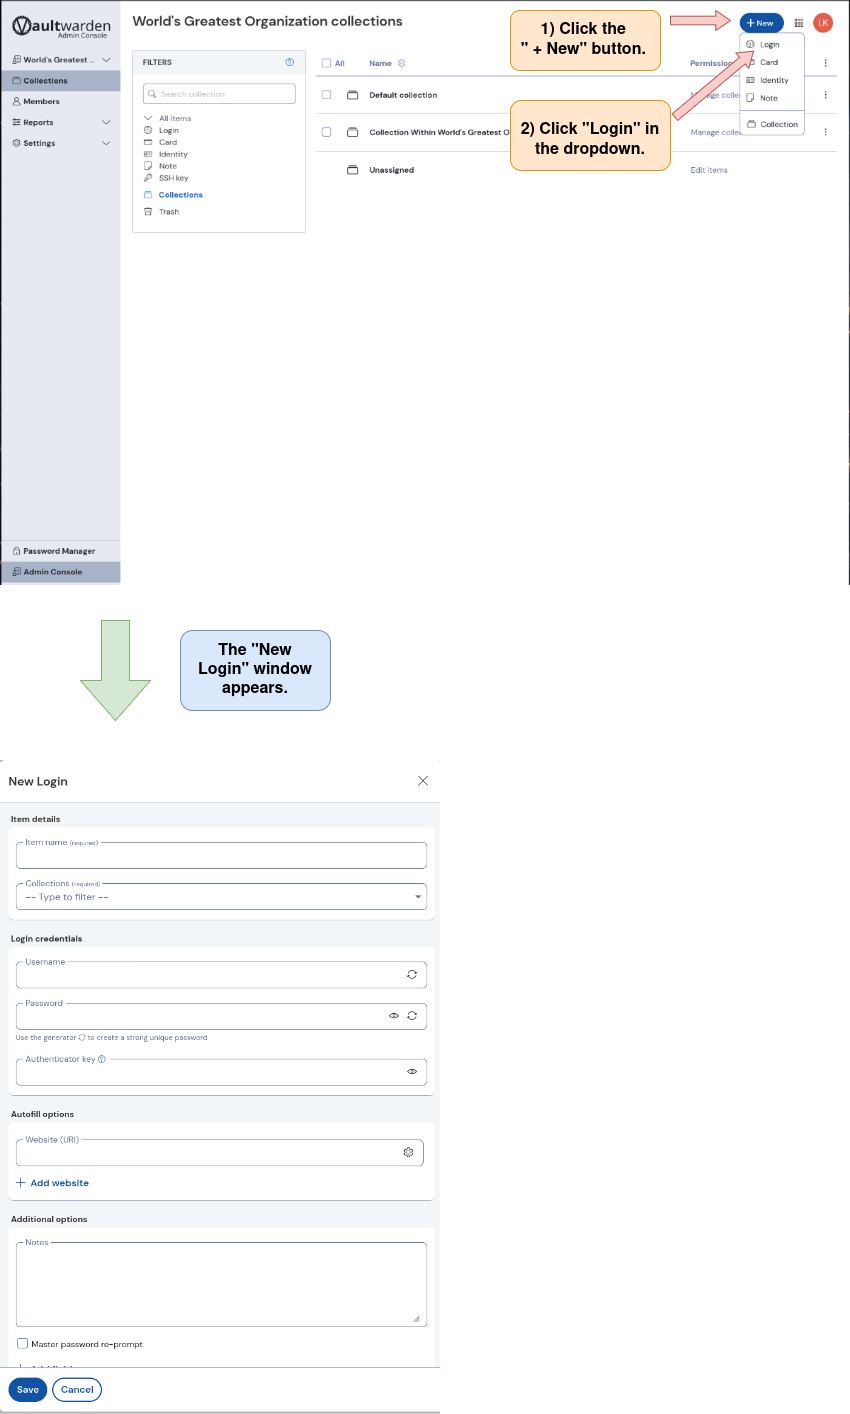
3b) Open the “New Login” window from the Admin Console.
-------
-------
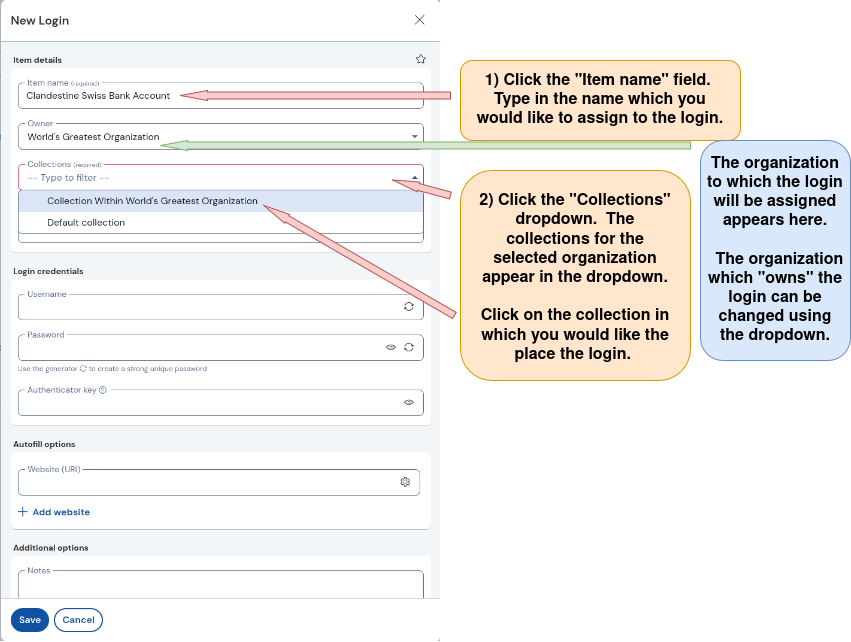
4) Name the new login and choose the collection where the login will be stored.
Collections are containers (similar to a file) within an organization where users who have permission can share access to files (such as logins). For more information on what a collection is, click here.
The “New Login” window is open. Follow the directions below.
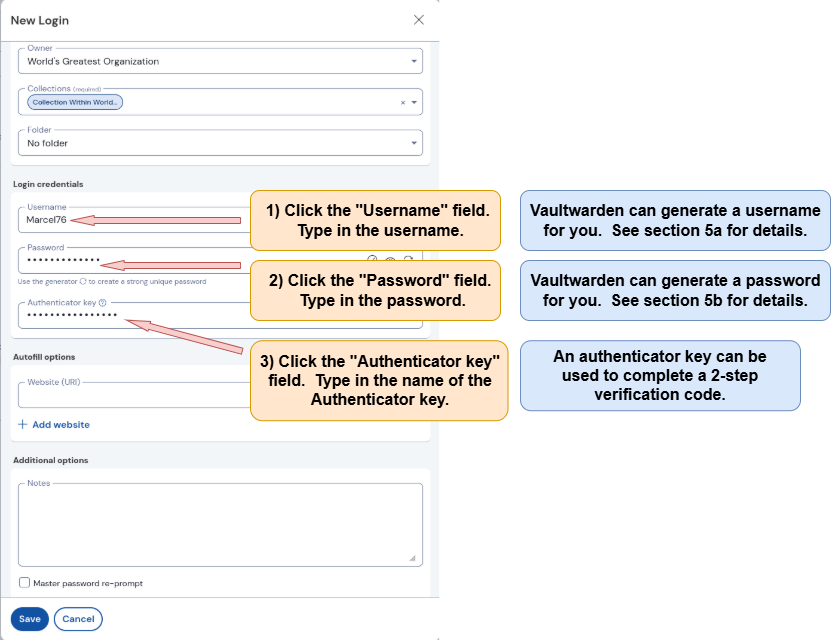
5) Enter login credentials: Username, Password, Authenticator Key.
The username, password, and authenticator key that are inputted into the “New Login” window will be used by Vaultwarden to log into the given website.
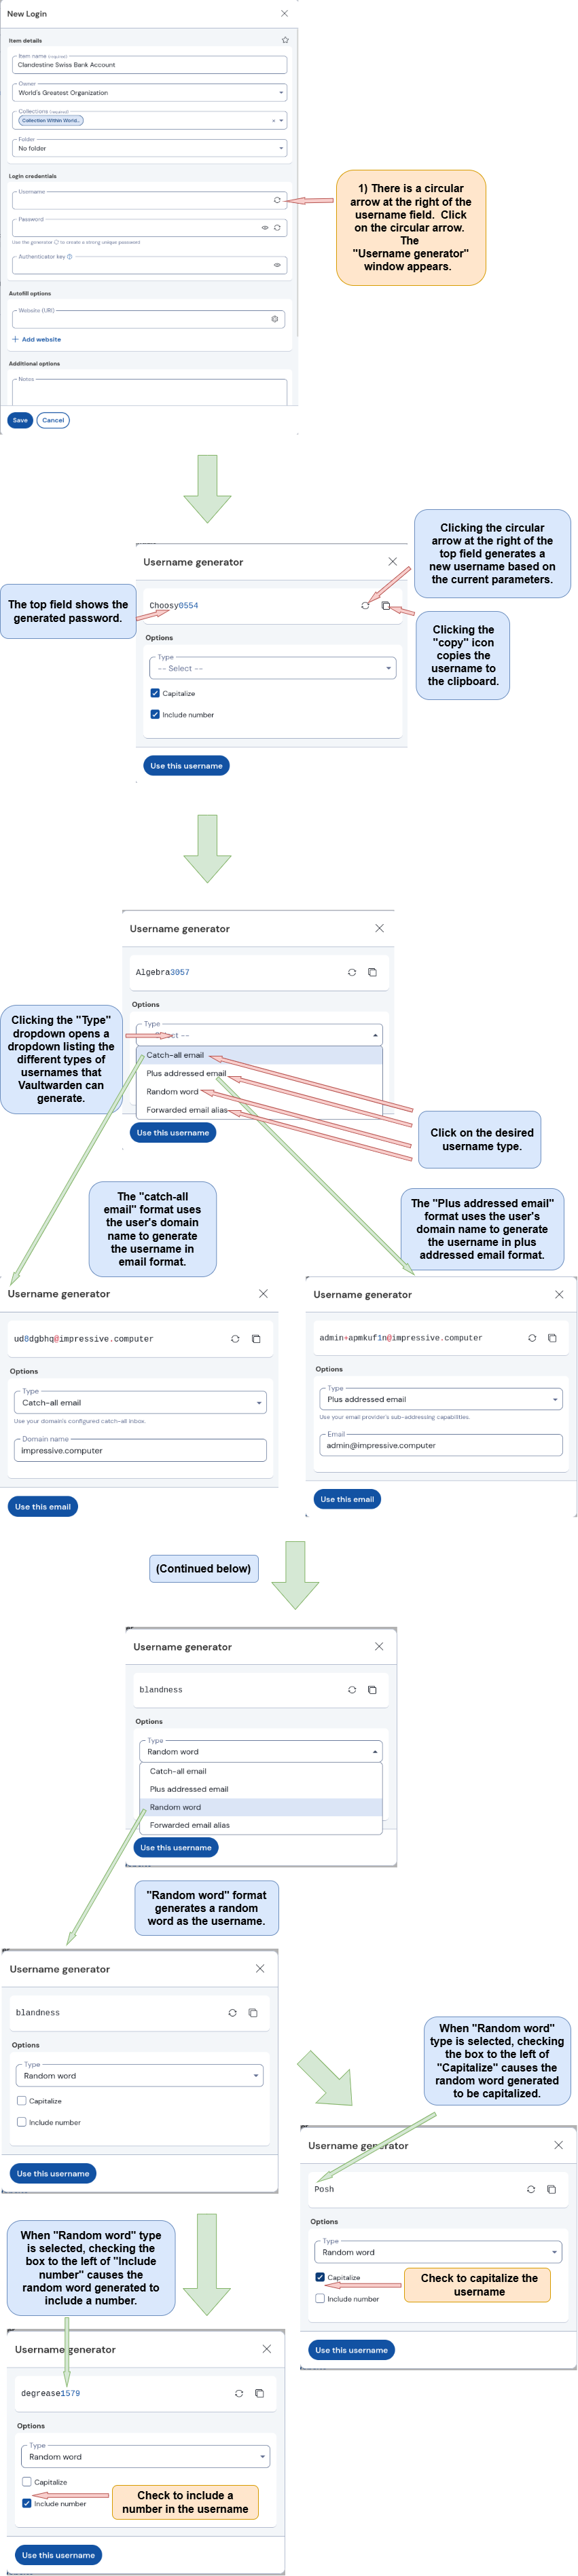
5a) Automatically Generate A Username (Optional)
Vaultwarden can generate a username to your specifications.
The “New Login” window is open. Follow the directions below.
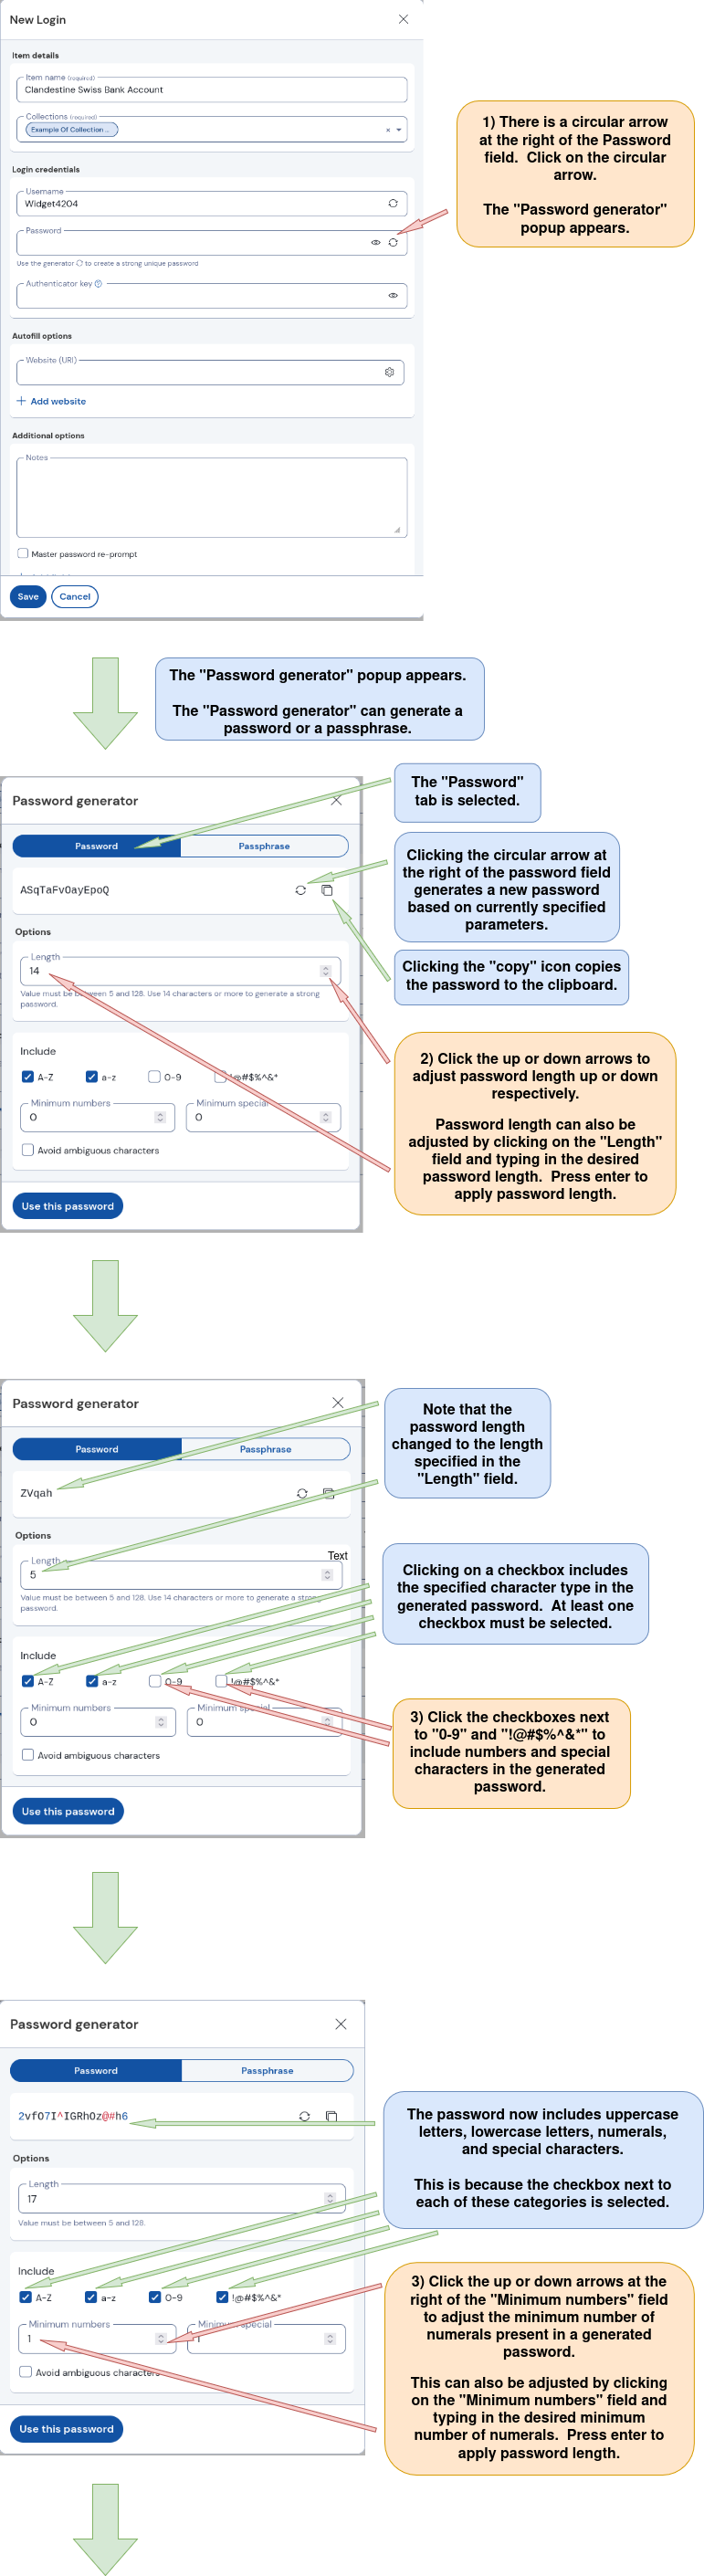
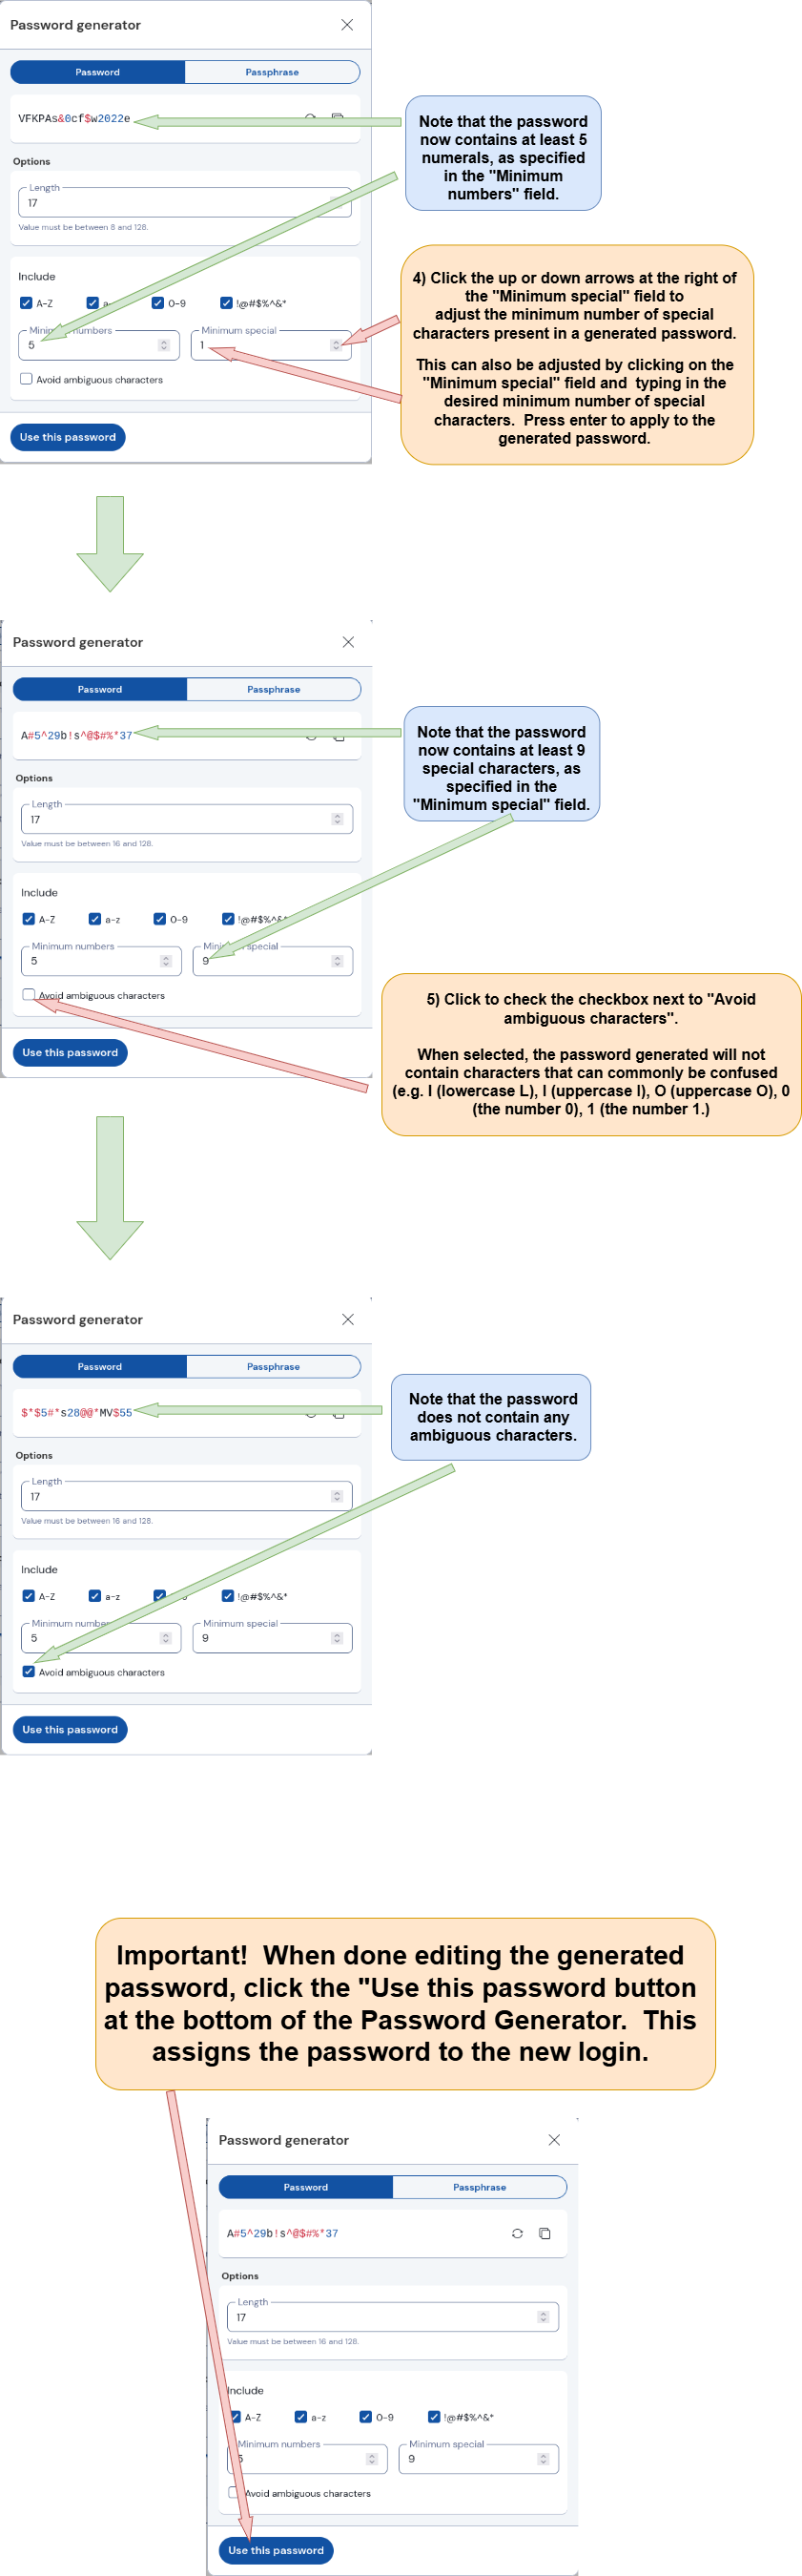
5b) Automatically Generate A Password (Optional)
Vaultwarden can generate a username to your specifications.
The “New Login” window is open. Follow the directions below.
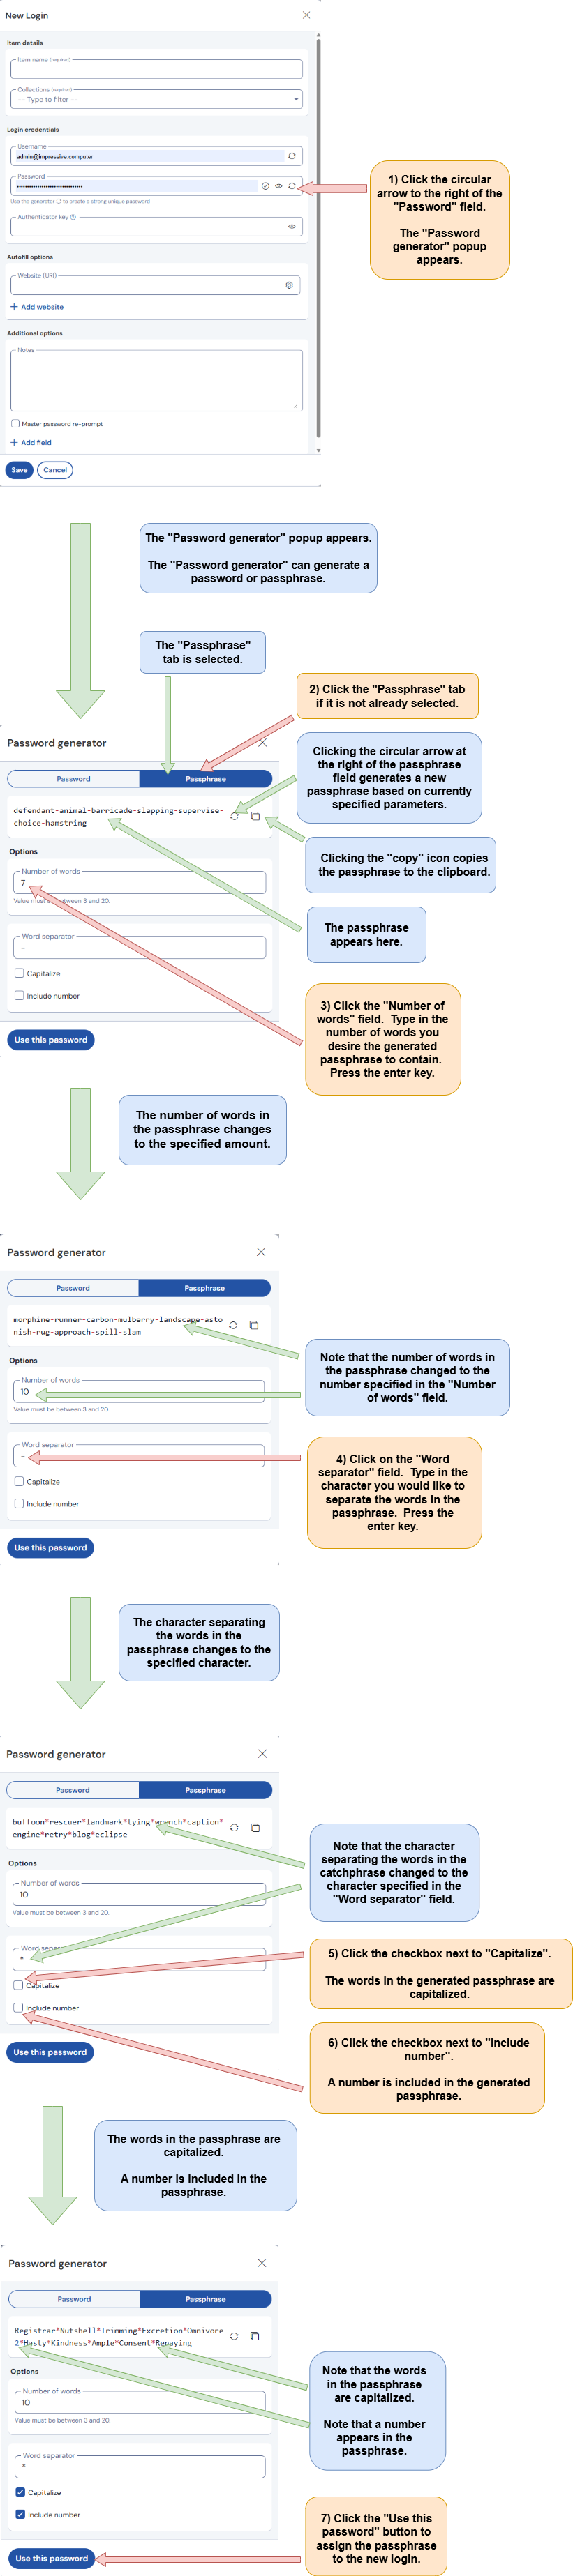
6) Automatically generate a passphrase (optional)
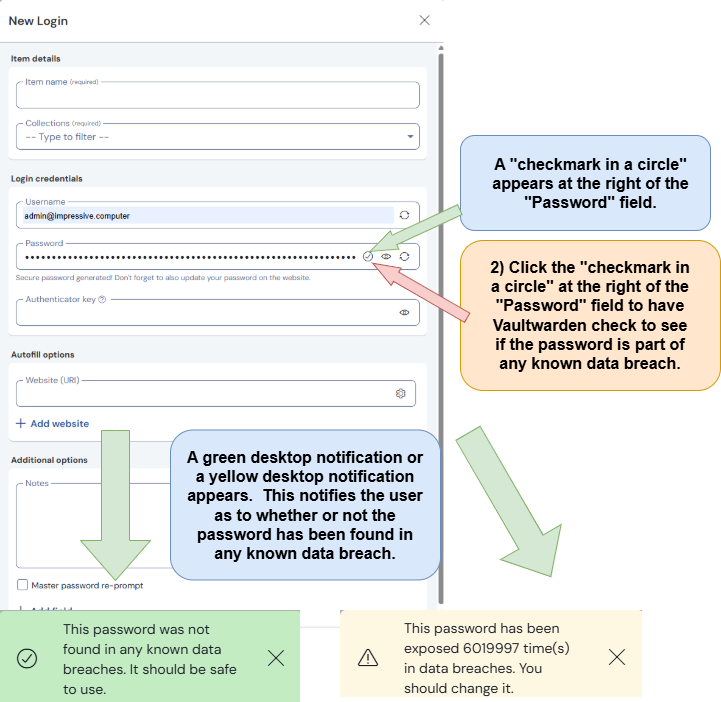
7) Check a password for known compromises
The “New Login” window is open. Follow the directions below.
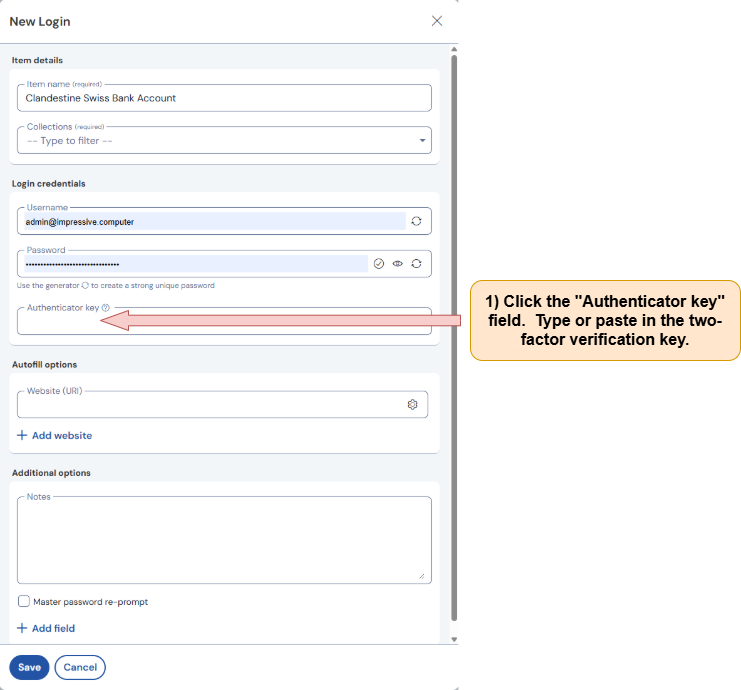
8) Assign an authenticator key to a login
The “New Login” window is open. Follow the directions below.
9) Assign a web address to be autofilled
The "New Login" window is open. Follow the directions below.

Click here for a detailed description of Vaultwarden’s match detection settings.
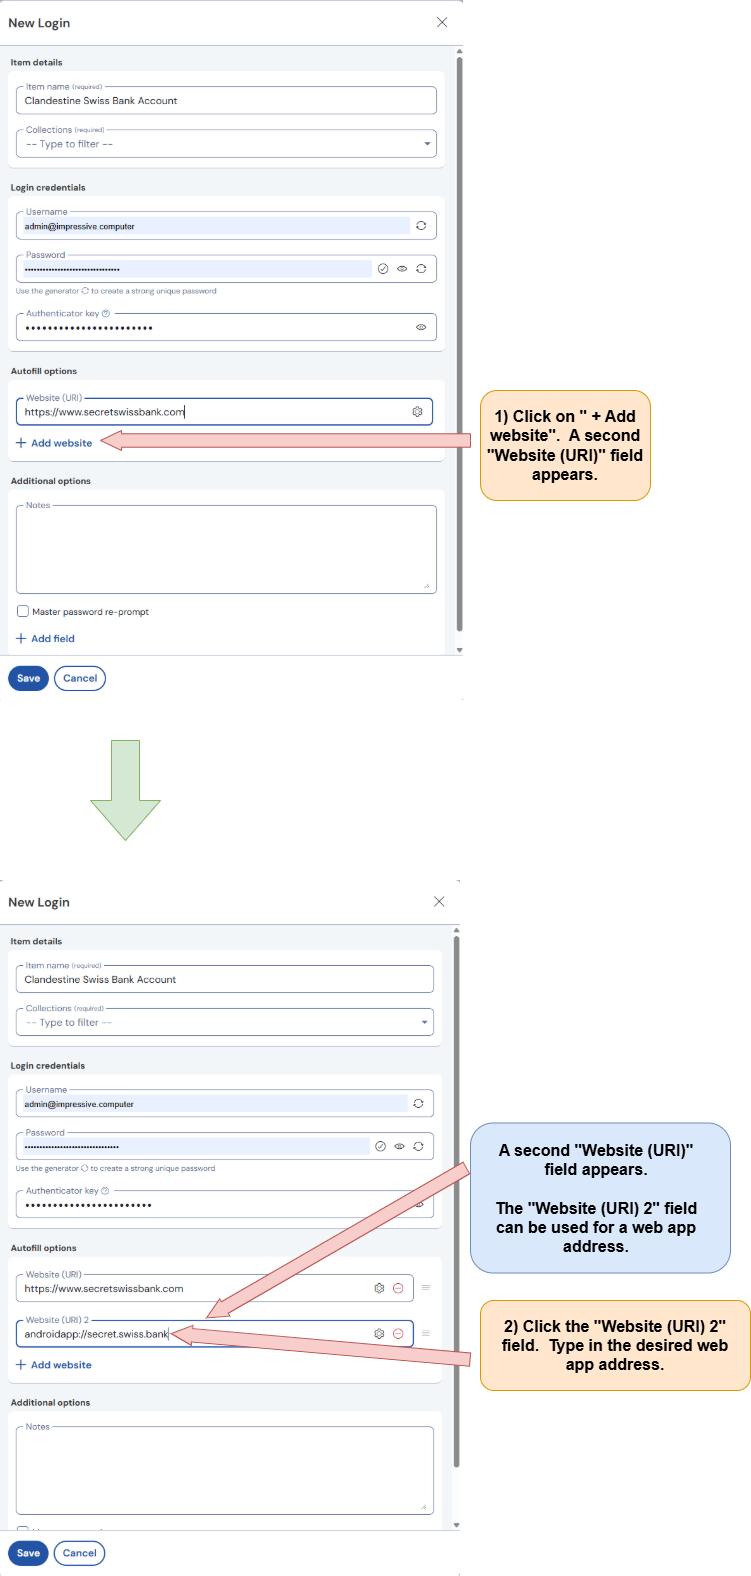
10) Add an additional URI where autofilling will occur
The "New Login" window is open. Follow the directions below.
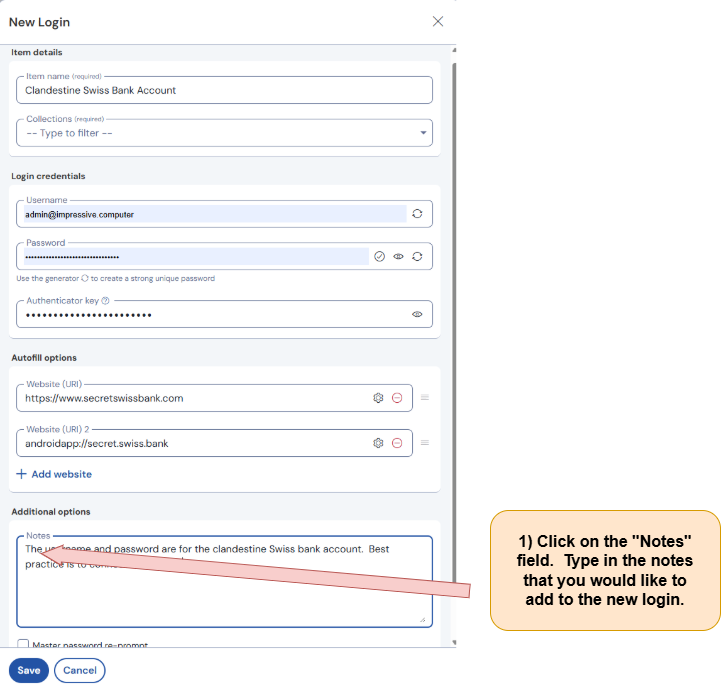
11) Add notes to a new login
The “New Login” window is open. Follow the directions below.
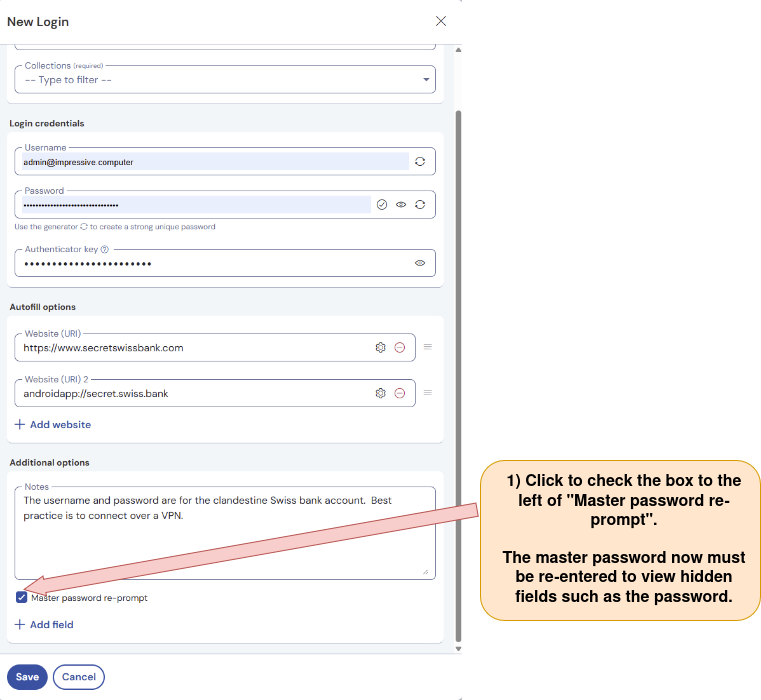
12) Require the master password to be re-entered in order to permit access to hidden fields such as password
The “New login” window is open. Follow the directions below.
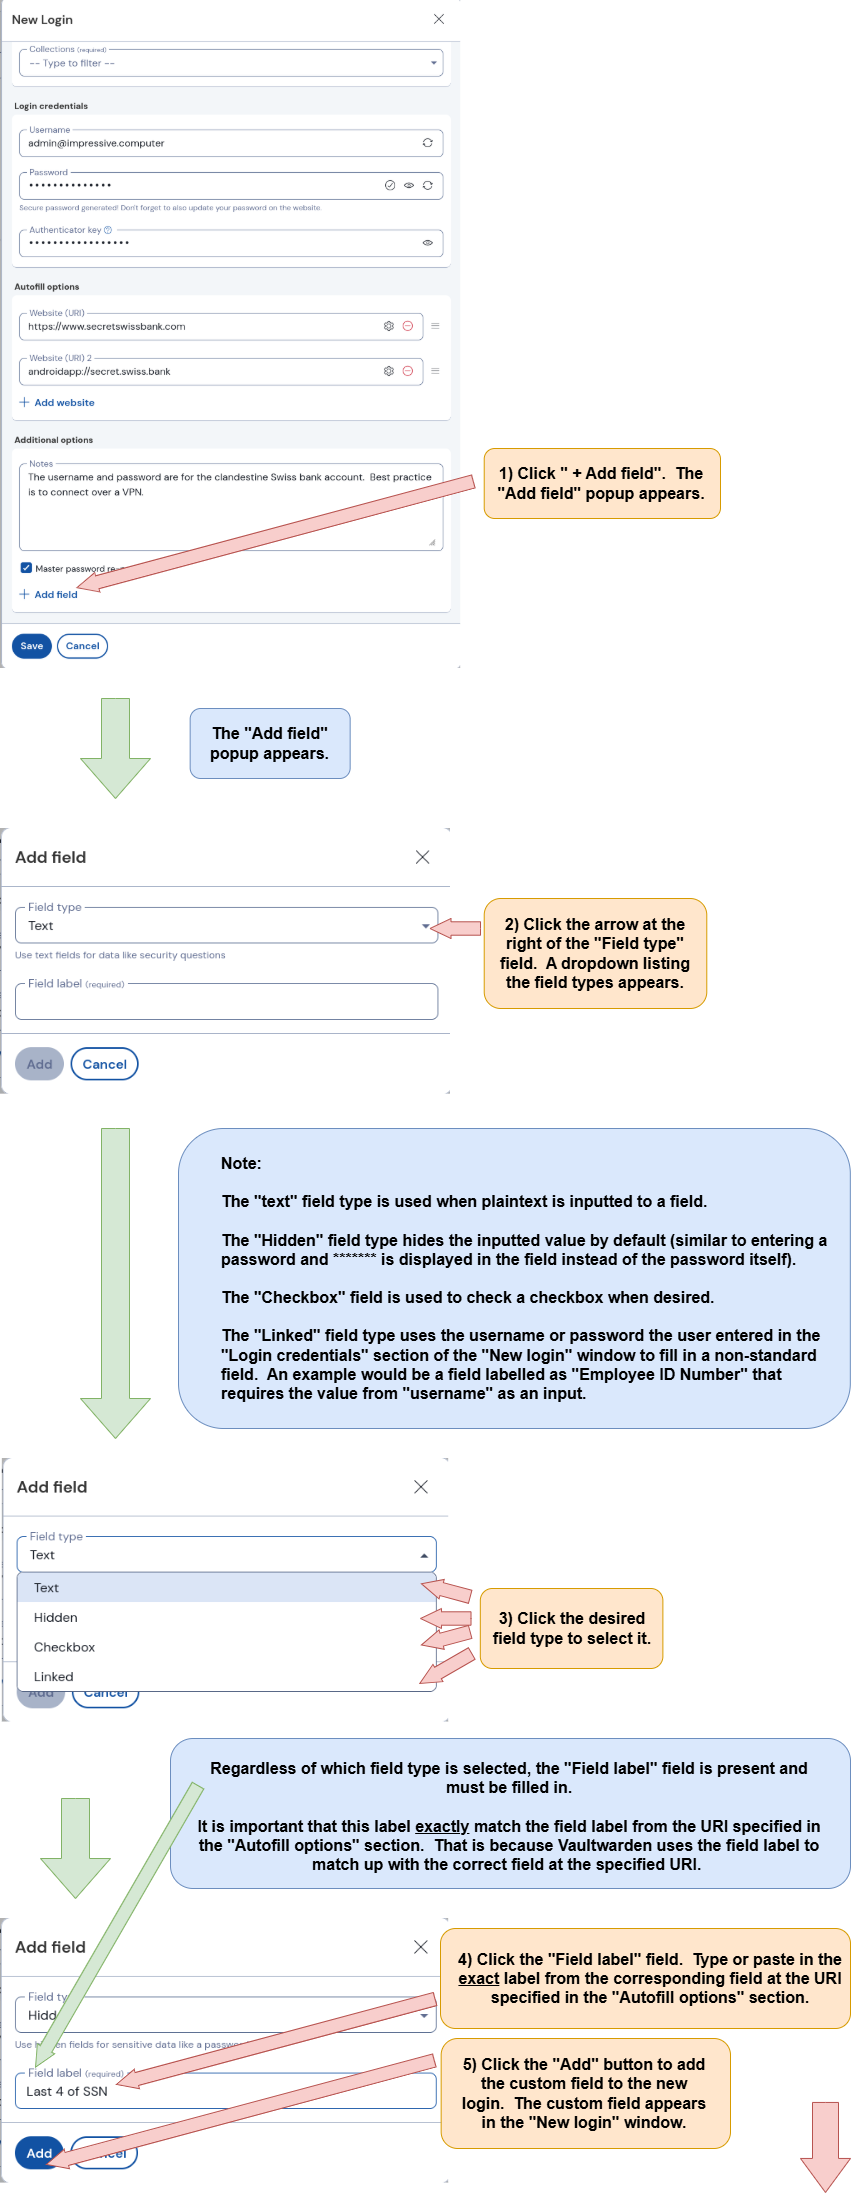
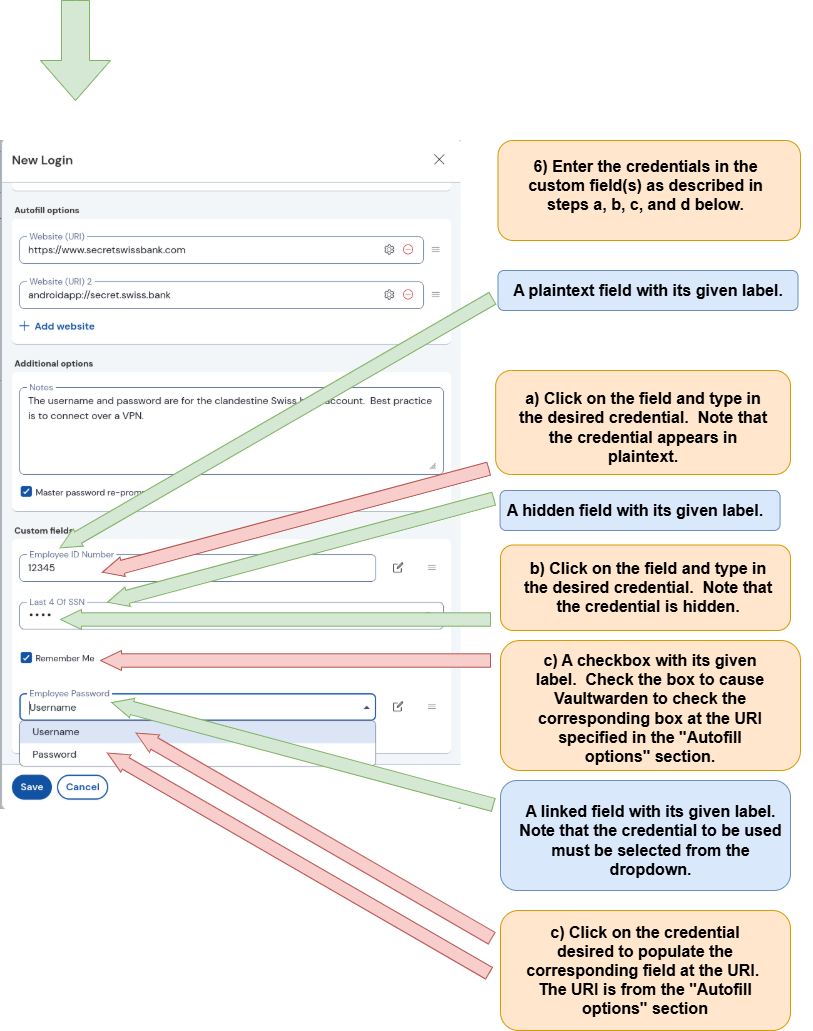
13) Add a custom field to the “Autofill options” section of the new log in
The login credentials (username, password, and authenticator key) can be set to autofill their corresponding fields at a URI specified in the “Autofill options” section. However, a website or app may have non-standard fields that the user would like to be auto-filled.
Custom fields that Vaultwarden will autofill can be added to the “New login” window by using “Add field”
The “New login” window is open. Follow the directions below.