1) Log into Element
1a) If the “Verify this device” window appears (see below) and you have your recovery key
If you have your Element recovery key or have it saved in a password manager such as Vaultwarden, click the “Verify with Recovery Key” button. Otherwise, go to step 1b.

You are then prompted to enter the recovery key in the Recovery Key field. Paste the recovery key into the Recovery Key Field. Click the Continue button.

Your device is now verified. Click the Done button to log into Element.

1b) If the “Verify this device” window appears (see below) and you do not have your recovery key
Note: This step is not needed if you already verified your device in step 1a.
This indicates that you do not have a recovery key or any devices that you can verify against. In this case you will need to reset your verification keys to verify your identity on this device.
Caution: Resetting your verification keys will prevent you from accessing your old encrypted messages. You will also have to verify your existing devices and contacts again if you reset your verification keys. To proceed with resetting your recovery keys, click the “Reset all” link.

If you get this screen, click the “Proceed with reset” button

To reset your verification keys, click the Continue button.

You will be prompted to use single sign on to prove your identity. Click the Single Sign On button.

Click the Continue with Authelia button when prompted.

Verify your device with Authelia, then click the Confirm button in the “Confirm encryption setup” pop-up window.

Your device is now verified. However, to encrypt your conversations and to have access to prior conversations you will need a recovery key. Go to step 2 to create a recovery key.
2) Create your recovery key
*When you log into Element, the “Set up recovery” window should appear in the upper left of your screen. Click the “Continue” button to set up your recovery key. If the “Set up recovery” window does not appear, go to step 2b.

The “Set up Secure Backup” window appears. Make sure that the radio button next to “Generate Recovery Key” is selected, then click the “Continue” button.

The system generates a recovery key and displays it in the window Make sure to keep this recovery key. You can save it in Vaultwarden and/or write it down and put it in a safe place.
The recovery key ensures that you can verify your device and have access to your prior conversations. You can easily copy the recovery key to the clipboard by clicking the “Copy” button in the “Save your Recovery Key” window.

2b) Create your recovery key when the “Set up recovery” window does not appear
After logging in to Element, on the Element home screen the user's first initial appears in a circle at the upper left. Click on this initial in the circle.

When you click on the initial in a circle it brings up a dropdown. Click on “Security and Privacy” in this dropdown.

Once you have clicked on “Security and Privacy”, the “Settings: Security and Privacy” window appears.

In the “Settings: Security and Privacy” window, click “Encryption” in the left sidebar. Then click on the “Verify this device” button.

The “Verify this session” window appears. Click on the “Reset all” link.

Click on the “Continue” button in the “Are you sure you want to reset your identity?” window.

Click the “Single Sign On” button to use Authelia single sign on to log in.

Click the “Continue with Authelia” button if you have an Authelia account.

If you have an Authelia account, sign into Authelia if you are not automatically signed in.

The Authelia page will automatically close. On the Element page, click the “Confirm” button in the “Confirm encryption setup” window.

You now have access to the “Settings: Encryption” window in Element. Click on the “Set up recovery” button in the “recovery” section of the “Settings: Encryption” window.

The “Set up recovery” window appears. Click on the “Continue” button in the “Set up recovery” window to generate a recovery key.

The “save your recovery key somewhere else” window appears.
Copy and paste your recovery key onto the clipboard.
It is very important that you not lose your recovery key, so you may also want to write it down and put it in a safe place. This key enables you to access past encrypted conversations. Once you have copied the key, click the “Continue” button in the “Save your recovery key somewhere else” window.

The “Enter your recovery key to confirm” window appears. Paste the recovery key into the “Enter recovery key” field. Click the “Finish set up” button, which is now active. Go to step 3.

3) Save your recovery key in your Vaultwarden account
Log in to Vaultwarden.

The Password Manager “Vaults” screen opens.

If you would instead like to assign a login to a new organization, first follow the directions in the “Create An Organization In Vaultwarden” document linked here.
Then, after you create the new organization, return to this document and follow the steps below to assign a login to the organization.
-------------
Assign the new login to an existing organization.
There are two methods that can be used to select the desired organization:
The user can select an organization via the Password Manager (steps 4a and 5a)
OR
The user can select an organization via the Admin Console (steps 4b and 4b).
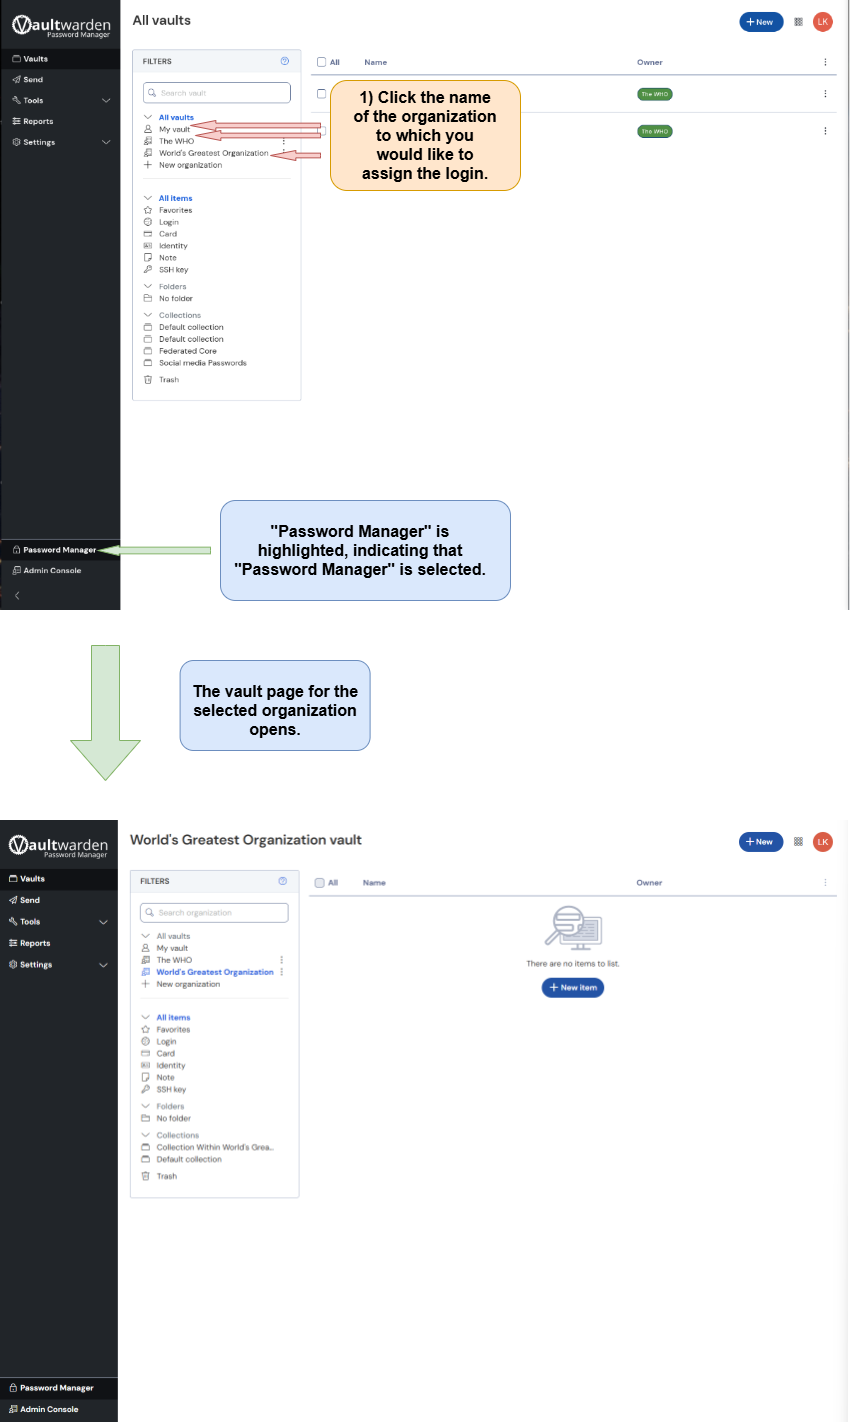
4a) Use The Password Manager Screen To Select An Organization
Use The Password Manager Screen To Select An Organization. Follow the directions below.
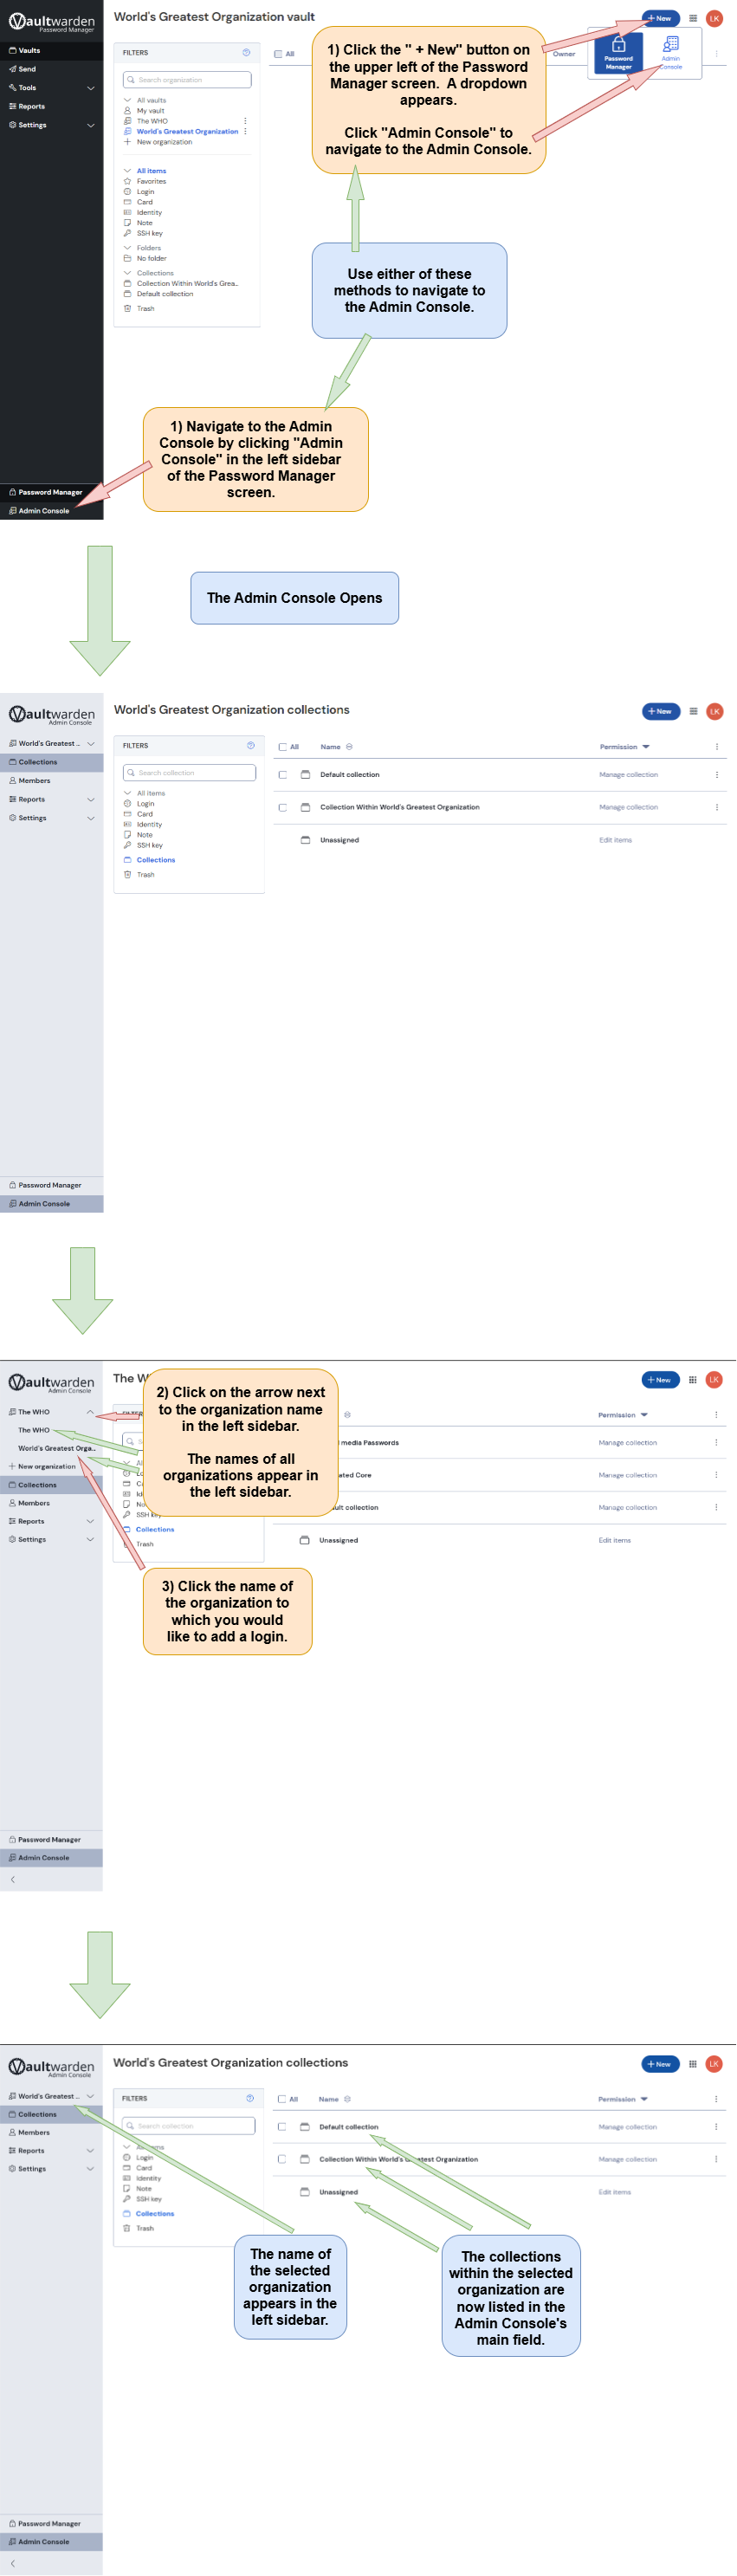
4b) Use The Admin Console To Select An Organization
Use the Admin Console to select the desired organization. Note that there are two methods for navigating to the Admin Console. Follow the directions below.
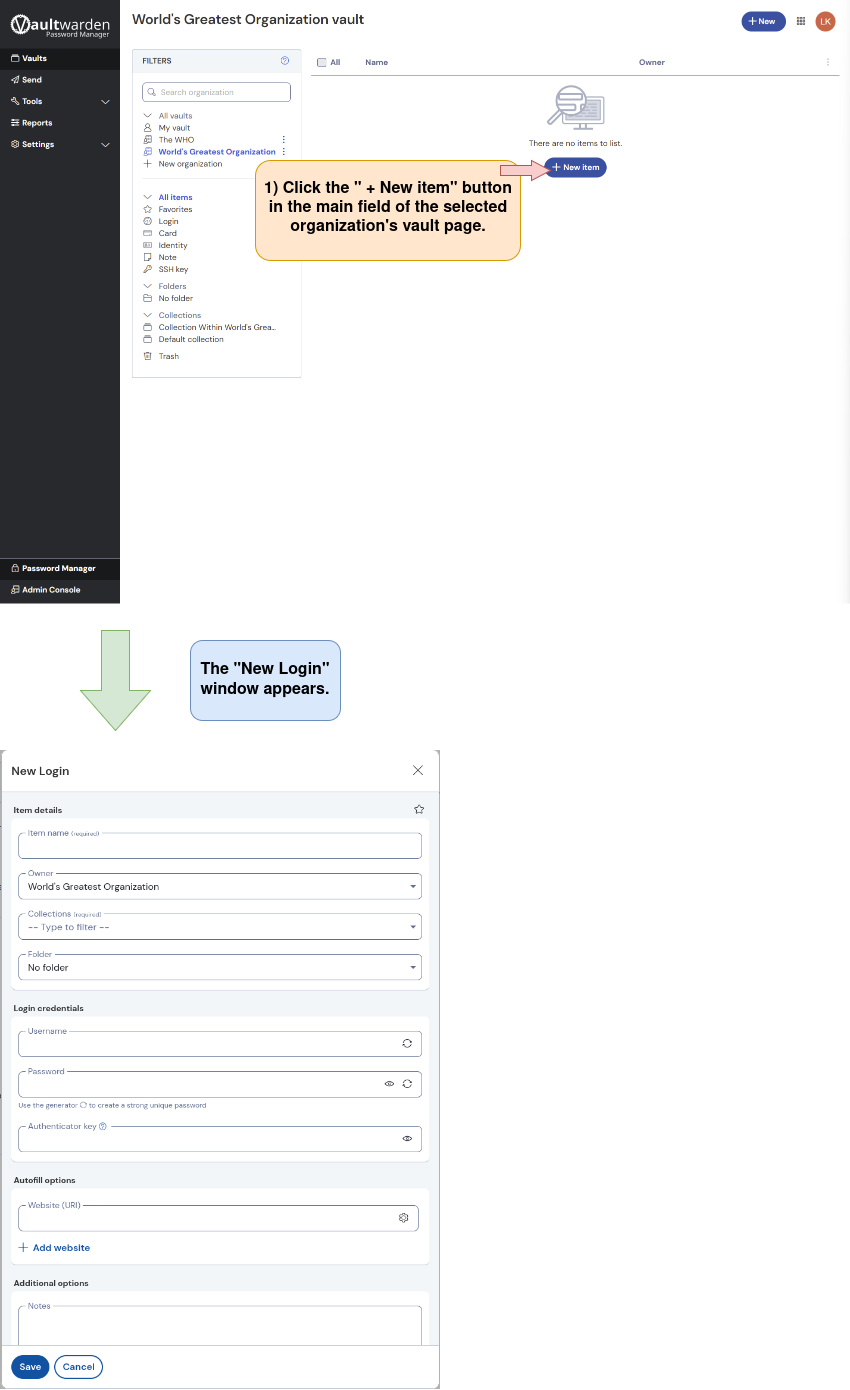
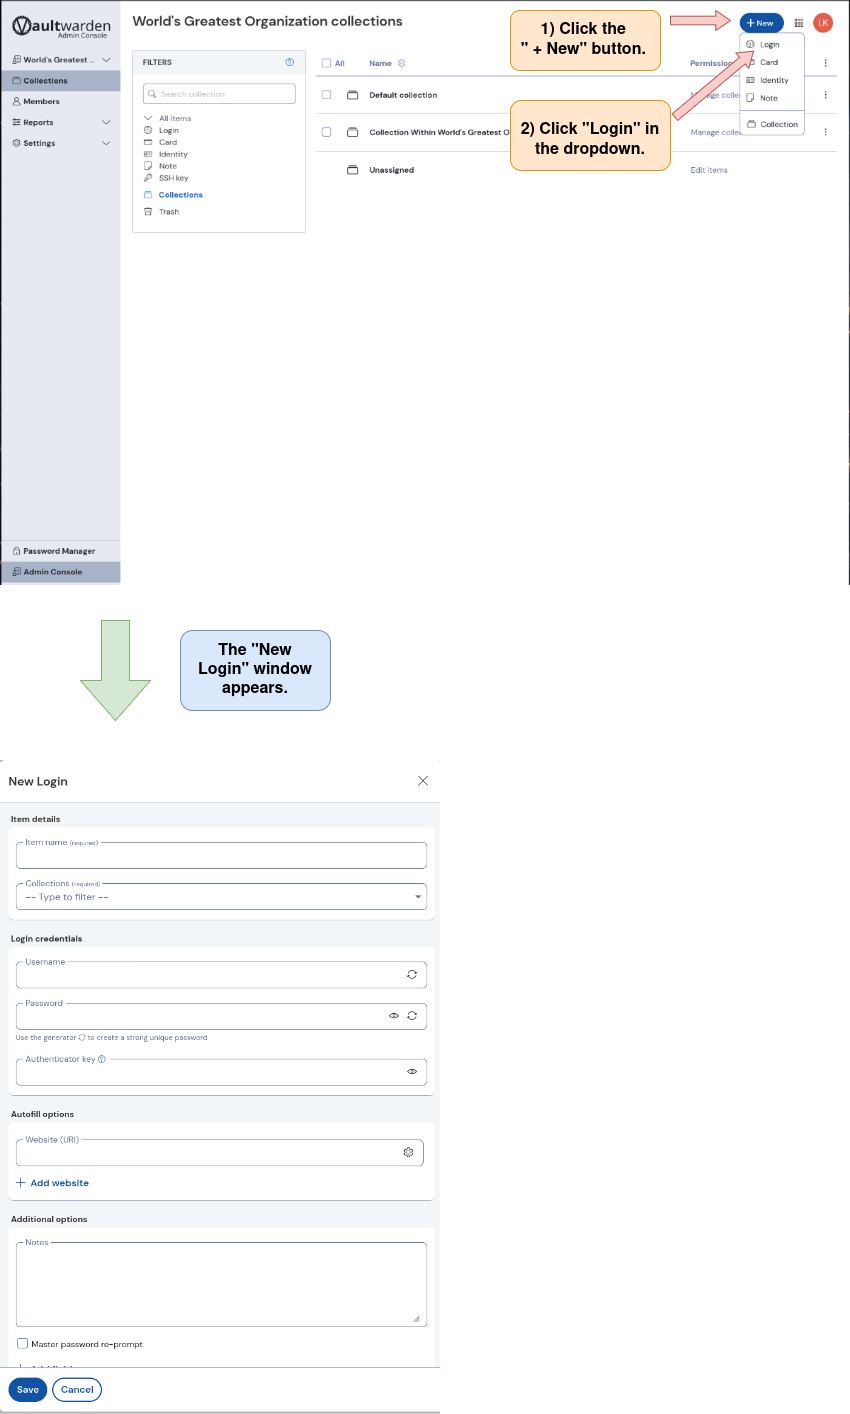
5a) Open the “New Login” window from the Password Manager screen.
There are two options for opening the “New collection” window from the selected organization’s vault page.
Option 1: Click the " + New Item" button in the main field of the selected organization’s vault page.
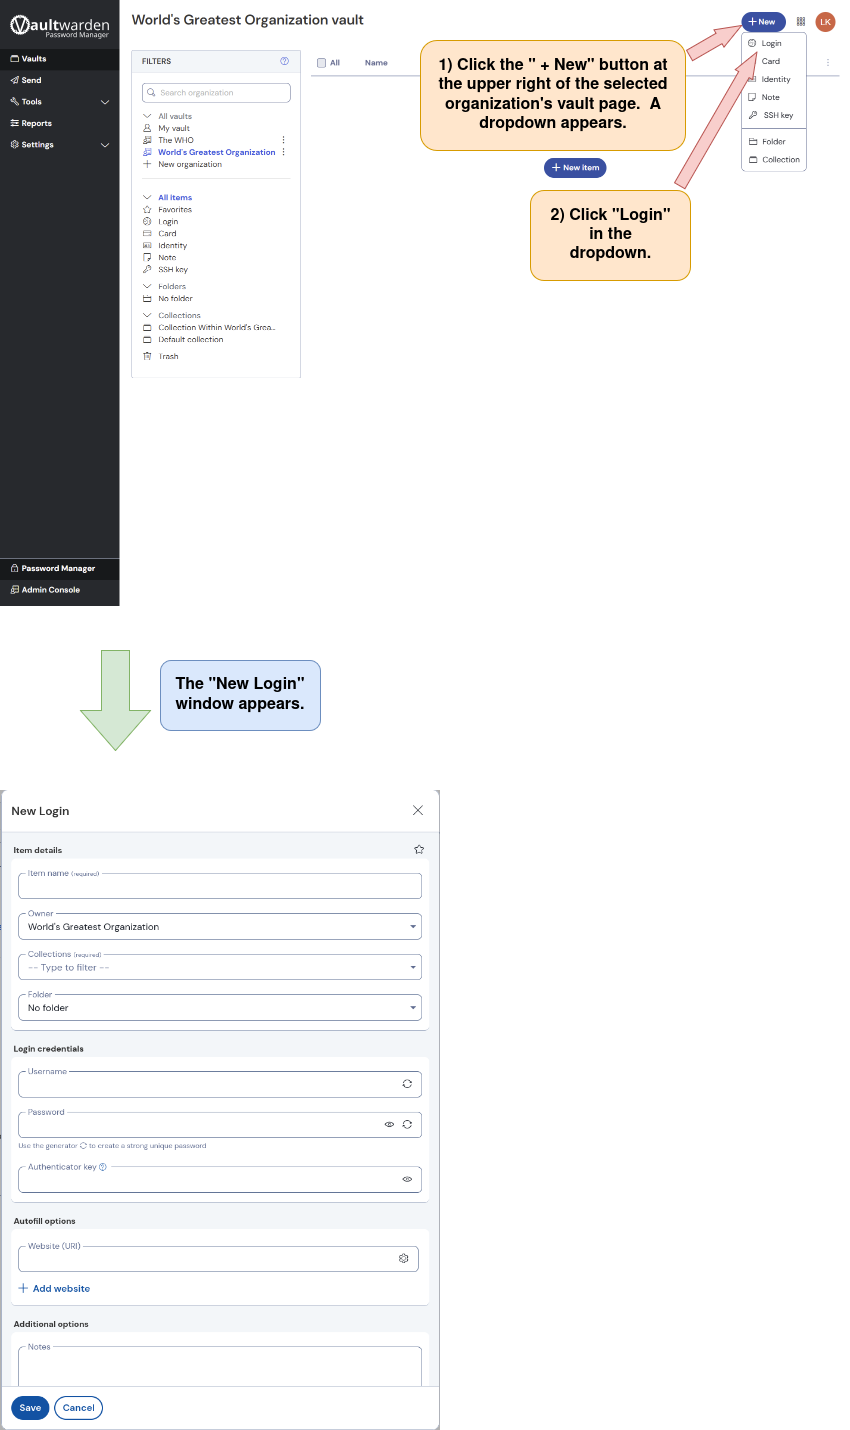
Option 2: Click the " + New" button in the upper right corner of the selected organization’s vault page. Then click “Collection” in the dropdown.
5b) Open the “New Login” window from the Admin Console.
-------
-------
6) Name the new login and choose the collection where the login will be stored.
Collections are containers (similar to a file) within an organization where users who have permission can share access to files (such as logins). For more information on what a collection is, click here.
The “New Login” window is open. Follow the directions below.
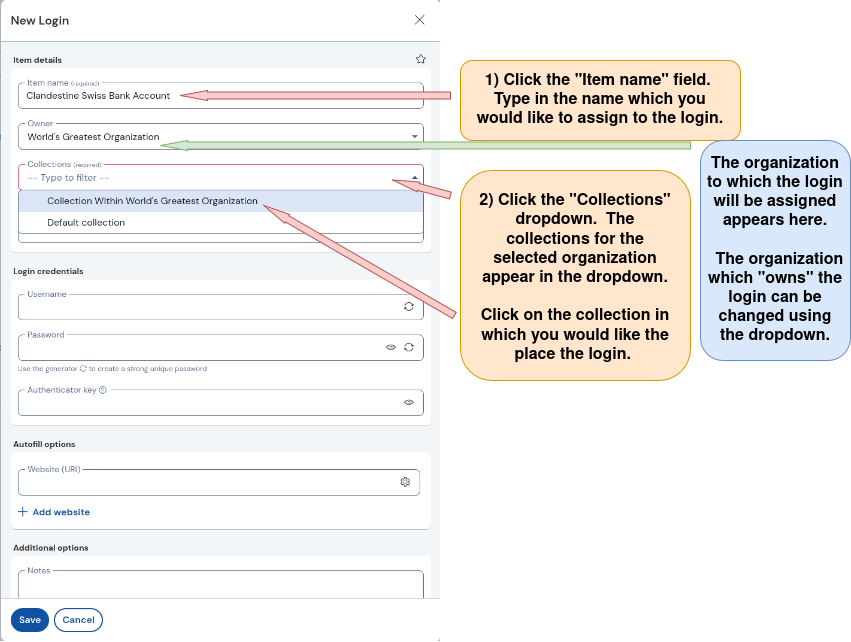
7) Enter the Element authenticator key in the “Notes” field of the “New Login” window.
The "New Login" window appears. Click on the "Name" field and type "Element Recovery Key". Then, go to the "Notes" field and paste in your Element recovery key.
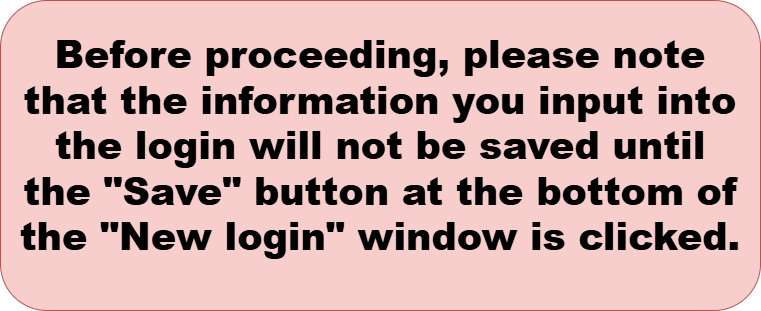
Be sure to click the “Save” button at the bottom of the “New Item” window when done.
