Add An Account In Panel
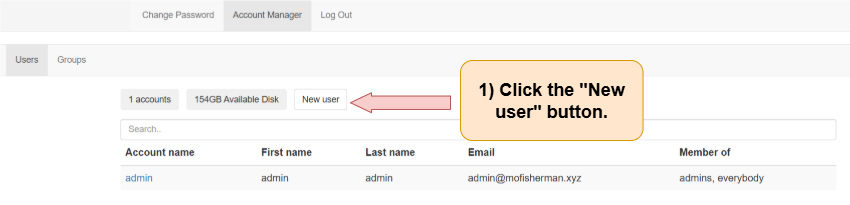
1) Use an account with admin privileges to log in to Panel
2) Click the “New user” button
After logging in to Panel, the user with admin privileges begins on the “Users” tab. The users under the main account are listed here.
Follow the directions below:
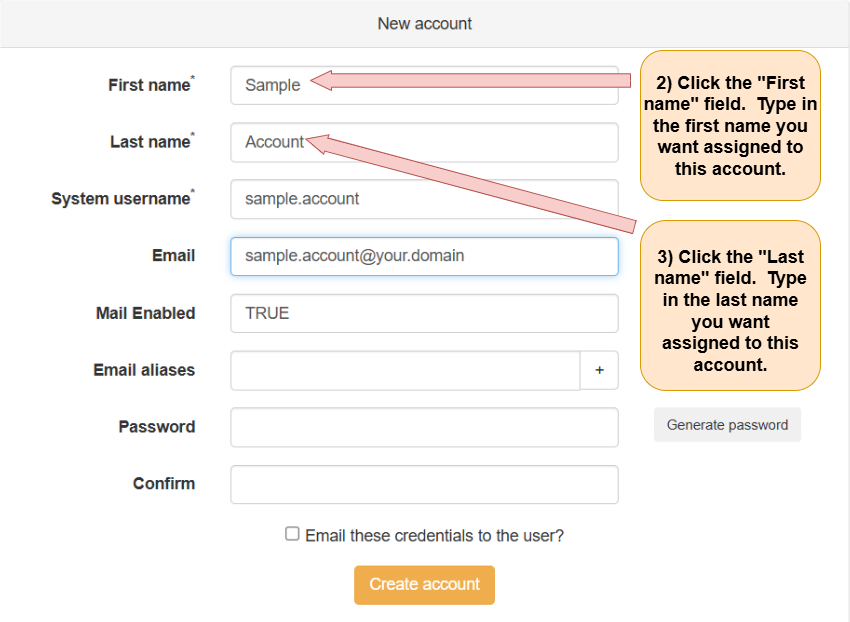
3) Enter the first and last names to be associated with the new account
The “New account” page opens. Follow the directions below:
4) Create a password
Follow the directions below.

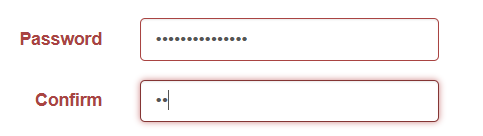
Note: If the data entered in the “Password” and “Confirm” fields do not match, the words “Password” and “Confirm” as well as the fields next to them turn red. Make sure the password you entered in each of the two fields match each other!
5) Change the system username (optional)
Panel automatically suggests a system username based on the first and last names you entered. You can change the system username by clicking the “System username” field and typing in the desired system username. Notice that the part of the email address to the left of the @ symbol changes when you change the username (see green highlighted area below). The domain (to the right of the @ symbol in the email address) must remain the same.

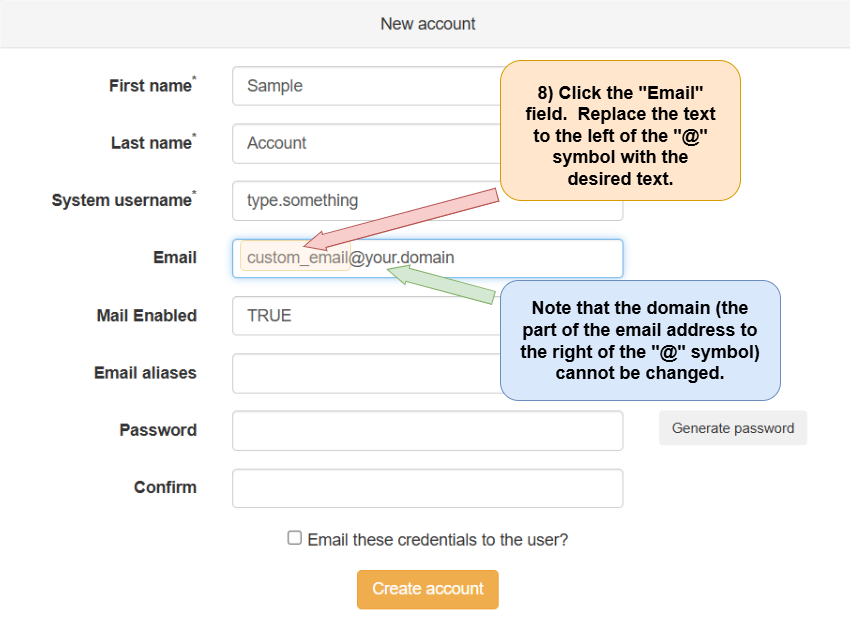
6) Manually change the new account’s email address (optional)
After you have filled out the “First name”, “Last name”, and “System username”, fields on the “New account” page, you can change the email for this account. Note that you can only change what is to the left of the @ symbol. To change the email associated with the new account go to the “Email” field and replace the text to the left of the @ symbol with the desired text.
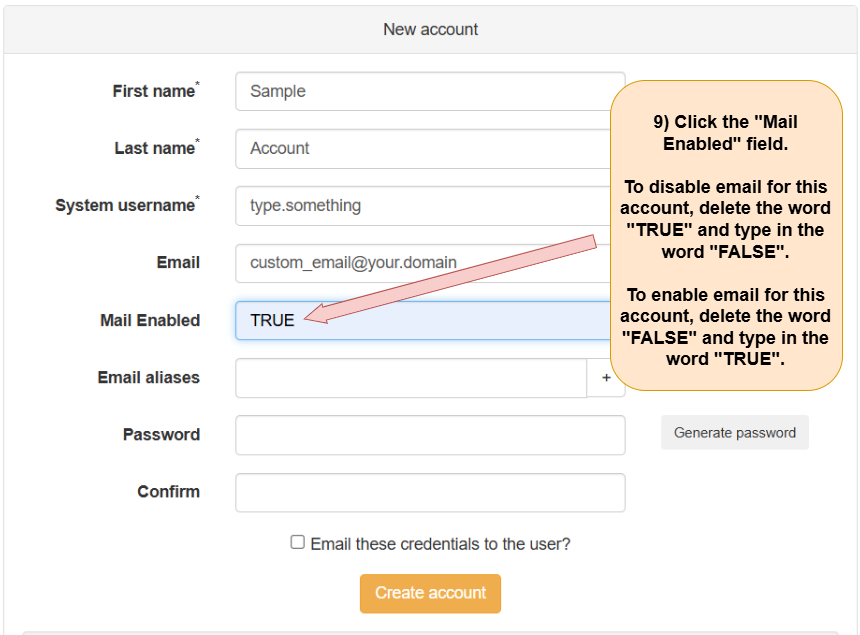
7) Enable or disable email for new account (optional)
Go to the “Mail enabled” field and replace the word TRUE with the word FALSE to disable email for this account. If disabling email for this user account is not desired, skip this step/leave the text reading TRUE in the “Mail enabled” field alone.
Enable email by clicking on the “Mail Enabled” field, deleting the word “TRUE” and typing the world “FALSE”
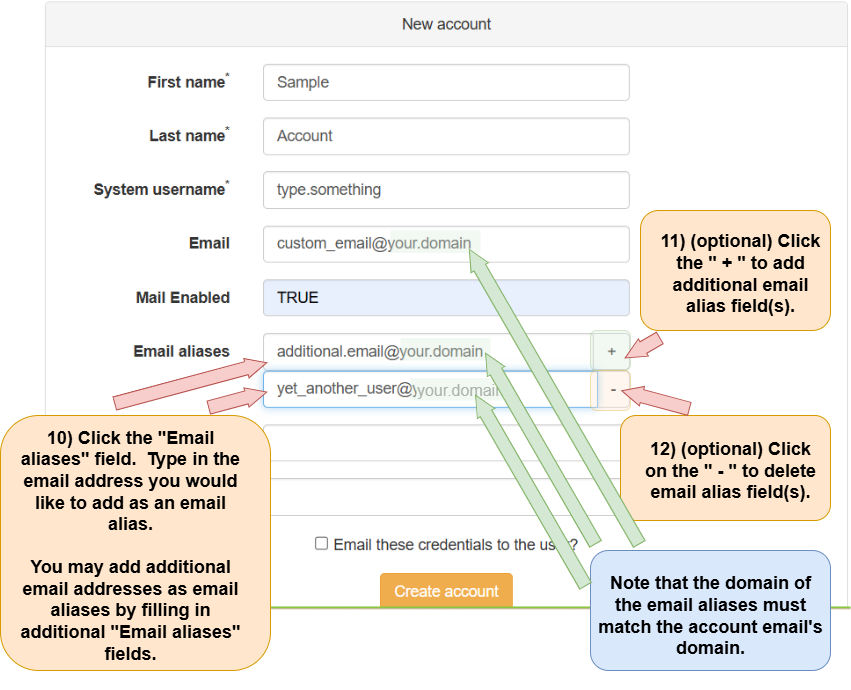
8) Add one or more email aliases (optional)
Note: Any email address added as an alias must use your Federated Core’s domain as the host. For example, if your domain is “your.domain” then any email alias entered must end with “@your.domain”.
(e.g. user_1@your.domain, sample@your.domain, etc.)
An email alias is an email address whose emails are set to go to another email account.
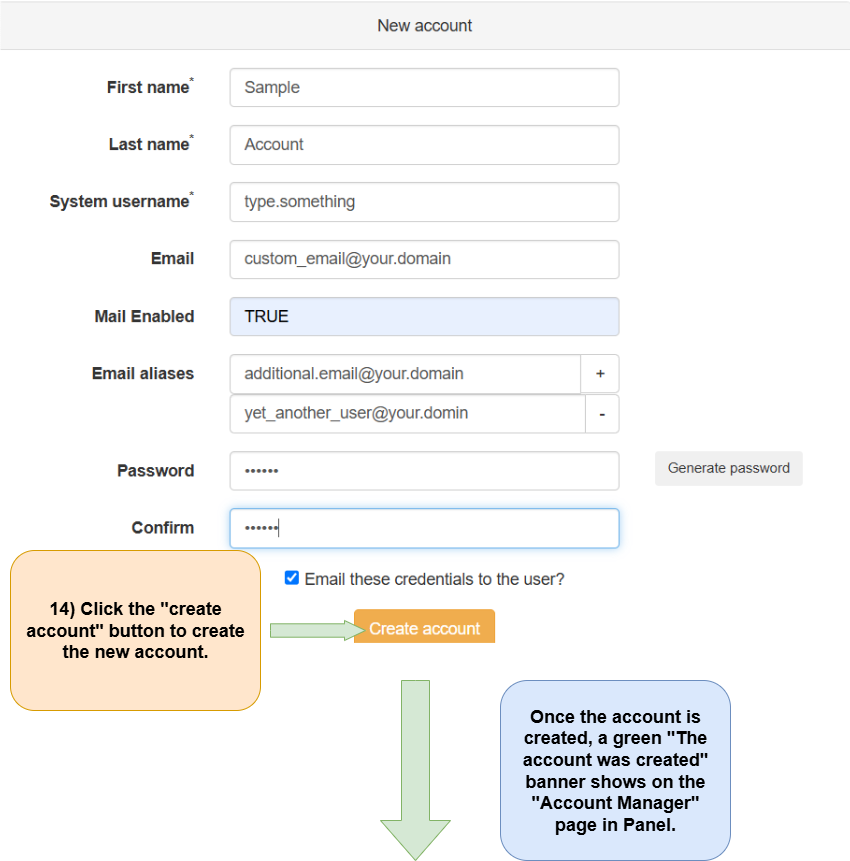
9) Email credentials to the user (optional)
At the bottom of the “New account” window there is a checkbox next to “Email these credentials to the user?” Click on the checkbox. A check appears in the checkbox indicating that once the account is created the credentials will be emailed to the user.
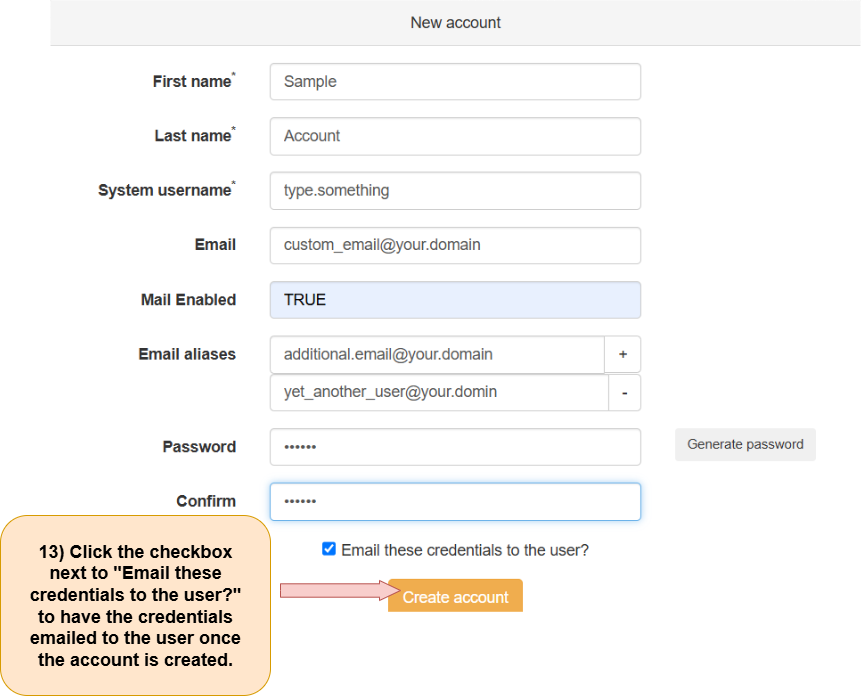
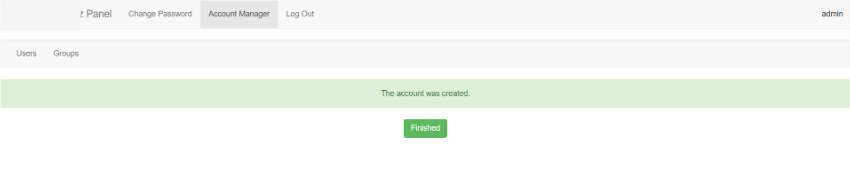
10) Create the new account
Click the “Create account” button at the bottom of the “New Account” window to create the new account.